

Brown Christmas Tree Decorating Guide: Your Complete 2024 Style Manual
Contents
- Brown Christmas Tree Decorating Guide: Your Complete 2024 Style Manual
- Why Brown? (And Why Now?)
- Project Overview: What You’re Getting Into
- The Non-Negotiable Must-Haves
- Your Hero Piece: The Statement Bow
- Ornaments: The Foundation
- Metallics: Your Secret Weapon
- Let’s Talk Lighting (Because It Matters More Than You Think)
- Step-by-Step Setup (The Way That Actually Works)
- Step 1: Prep Your Tree
- Step 2: Add Lighting First
- Step 3: Ribbon Time
- Step 4: Large Ornaments First
- Step 5: Medium Ornaments Fill In
- Step 6: Small Ornaments and Details
- Step 7: The Statement Bow
Brown Christmas tree decorations might sound unconventional, but I’m here to tell you they’re about to become your new obsession.
I stumbled onto this trend accidentally last year when I couldn’t find the traditional red ornaments I wanted, and honestly, I haven’t looked back since.

Why Brown? (And Why Now?)
You’re probably wondering if I’ve lost my holiday spirit. Hear me out.
Brown creates this warm, sophisticated vibe that feels less “holiday chaos” and more “cozy luxury lodge.” It’s unexpected without being weird. Plus, it photographs like a dream if you’re the type who shares your tree on Instagram.
The chocolate brown Christmas trend has exploded because people are tired of the same old red-and-green combo everyone defaults to. This isn’t your grandmother’s Christmas tree (no offense to grandmothers).
Project Overview: What You’re Getting Into
Time Investment: 2-4 hours for a fully decorated tree
Budget Range: $50-$300+ (depending on how fancy you want to get)
Skill Level: Complete beginner-friendly
Best For: Living rooms, entryways, bedrooms where you want impact
I decorated my 7-foot tree in about three hours while watching holiday movies, so don’t stress about this being complicated.
The Non-Negotiable Must-Haves
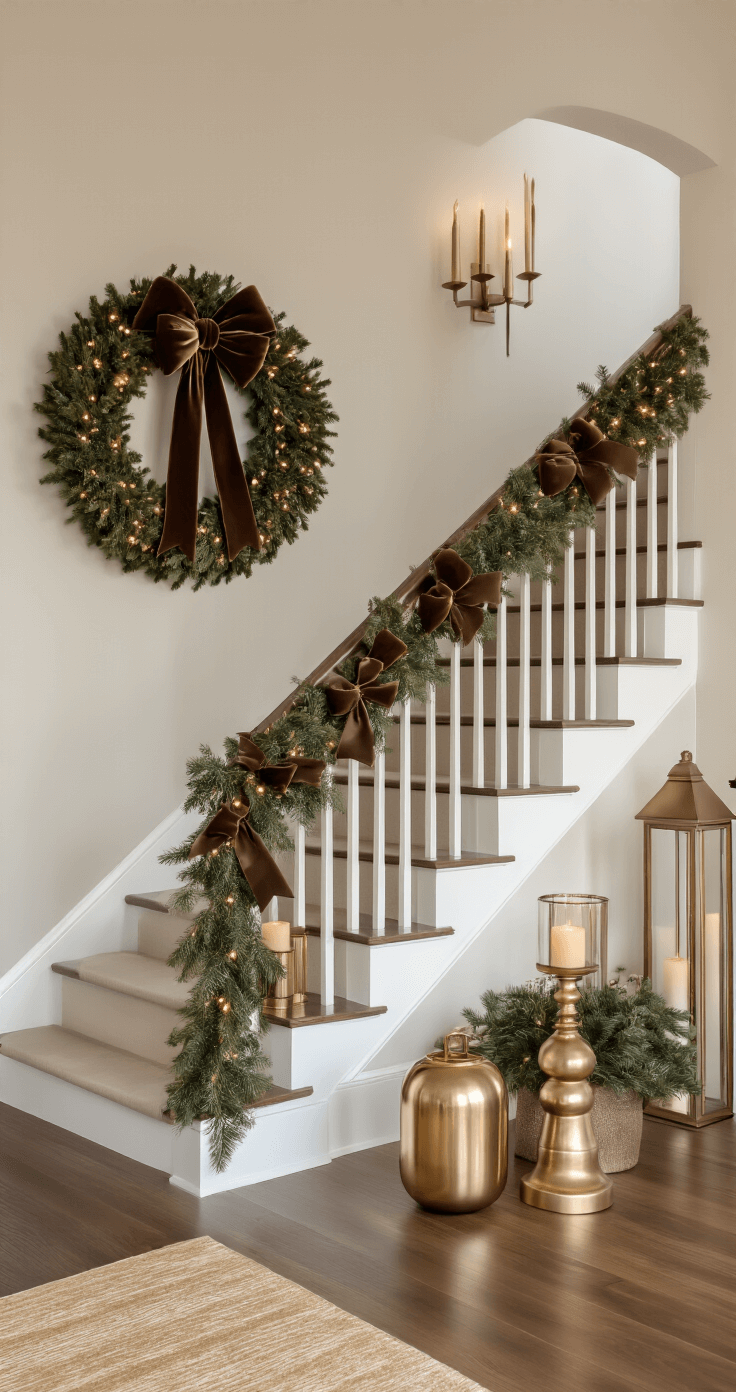
Your Hero Piece: The Statement Bow
Listen carefully because this is critical.
You need a large chocolate brown velvet bow. Not a small one. Not a “modest” one. A proper, dramatic, “yes-I-meant-to-do-that” bow.
Position it at the top of your tree or offset slightly to one side for that casual-but-intentional look. This single piece anchors your entire design and tells guests “I know what I’m doing.”
Pro tip: If you’re crafty, make your own with brown satin ribbon, but honestly, buying pre-made saves time and usually looks better unless you’re secretly a florist.
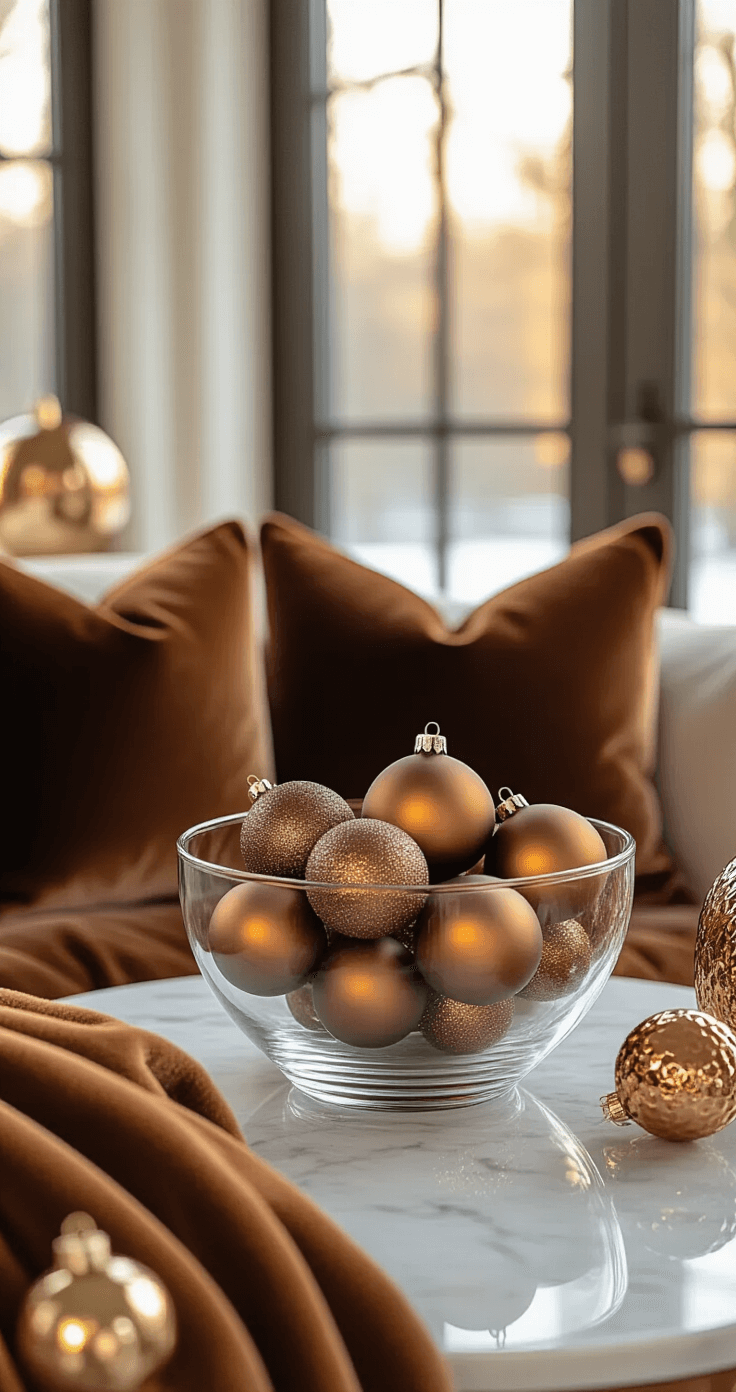
Ornaments: The Foundation
You’ll need variety in:
- Finishes (matte, glossy, glittery)
- Sizes (small, medium, large)
- Textures (smooth glass, fuzzy, metallic)
I recommend grabbing a brown ornament set as your base—usually 50-100 pieces depending on tree size.
Shopping strategy:
- 40% chocolate brown (your main color)
- 30% bronze and copper tones (adds depth)
- 20% champagne or gold (brings light)
- 10% cream or ivory (prevents darkness overload)
Don’t buy everything in one finish. Mix shiny glass ornaments with matte velvet ones and some glittery pieces. This creates visual interest instead of a flat, monotone look that screams “I bought one box and called it done.”
Metallics: Your Secret Weapon
Gold and bronze are your best friends here.
I weave gold wire-edge ribbon through my tree branches—not in perfect loops, just loosely tucked here and there. It catches the light beautifully and prevents the brown from feeling too heavy.
Metallic additions that work:
- Gold ball ornaments scattered throughout
- Bronze pinecones (real or faux)
- Copper wire lights (more on this later)
- Champagne-colored picks or sprays
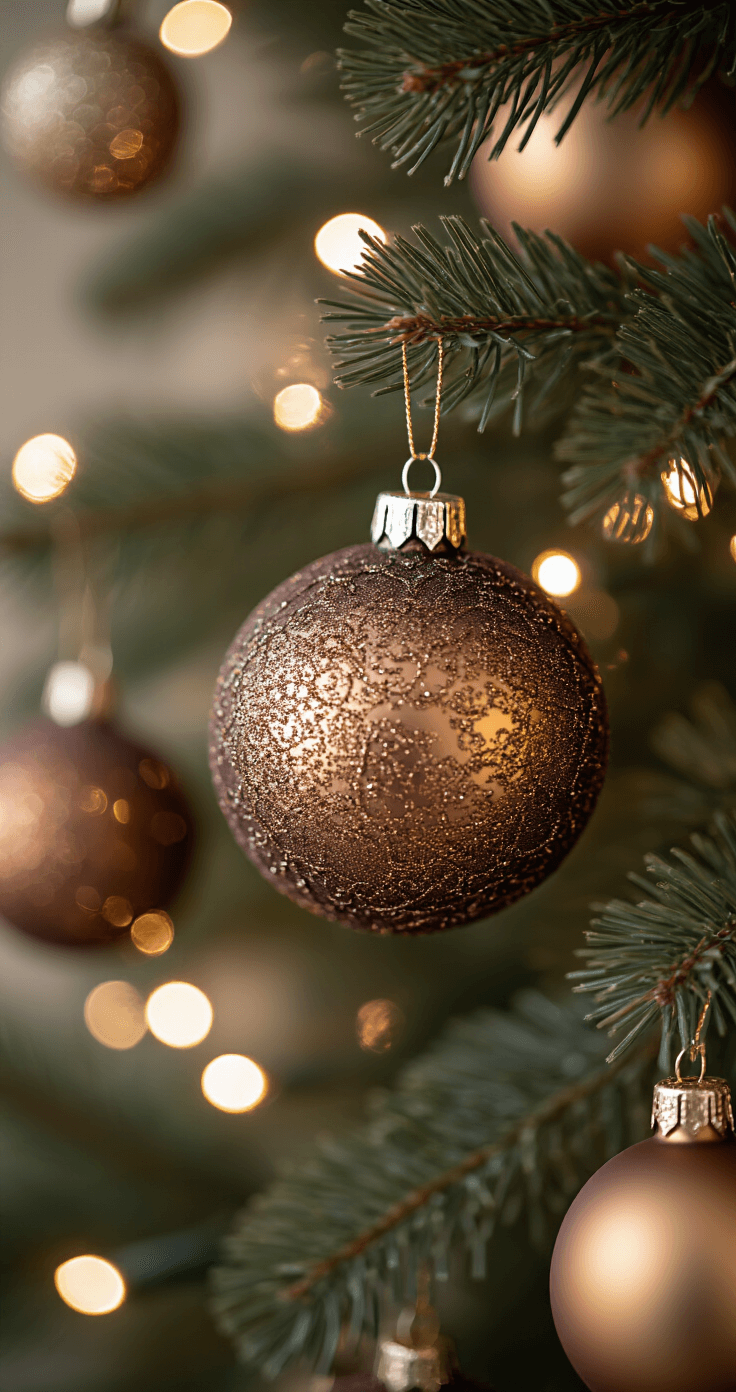
Let’s Talk Lighting (Because It Matters More Than You Think)
Cool white lights will make brown ornaments look muddy and sad. Warm white or soft gold lights are mandatory.
I learned this the hard way when my tree looked like a mud puddle the first year. Switched to warm white LED string lights and suddenly my tree looked expensive instead of depressing.
Light ratio: Aim for 100 lights per foot of tree height.
Step-by-Step Setup (The Way That Actually Works)
Step 1: Prep Your Tree
Fluff every single branch. Yes, every one. This takes 20 minutes and makes a 200% difference.
Pull branch tips slightly forward and outward to create depth. Your ornaments need places to nestle into, not just surfaces to hang from.
Step 2: Add Lighting First
String lights from the trunk outward, wrapping around branches rather than just draping them on tips. This creates that “glowing from within” effect instead of “lights stuck on the surface.”
Work in a spiral from bottom to top, tucking lights deeper into the tree about halfway through, then bringing the outer layer to the front.
Step 3: Ribbon Time
Before ornaments, add your ribbon. Cut 2-3 yard sections of ribbon and tuck them vertically through the tree in a loose, flowing pattern.
Don’t make perfect loops. Let the ribbon cascade naturally, securing it to branches with floral wire if needed.
Step 4: Large Ornaments First
Start with your biggest ornaments (3-5 inches) and place them strategically:
- One-third of the way from the top
- Mid-level, offset from the first
- Bottom third, visible but not overwhelming
Space them evenly around the tree’s circumference. Step back frequently to check balance.
Step 5: Medium Ornaments Fill In
These workhorses (2-3 inches) fill the gaps between your large statement pieces. Cluster three together occasionally for visual interest, but mostly distribute them evenly.
Vary the depth—some should sit at the branch tips, others tucked deeper toward the trunk.
Step 6: Small Ornaments and Details
Tiny ornaments (1-2 inches) fill remaining gaps and add density. Tuck these deeper into the tree to create layers and prevent that “hollow” look.
Step 7: The Statement Bow
Secure your magnificent
This post may contain affiliate links. Please see my disclosure policy for details.


