Why You’ll Actually Love This Project
Contents
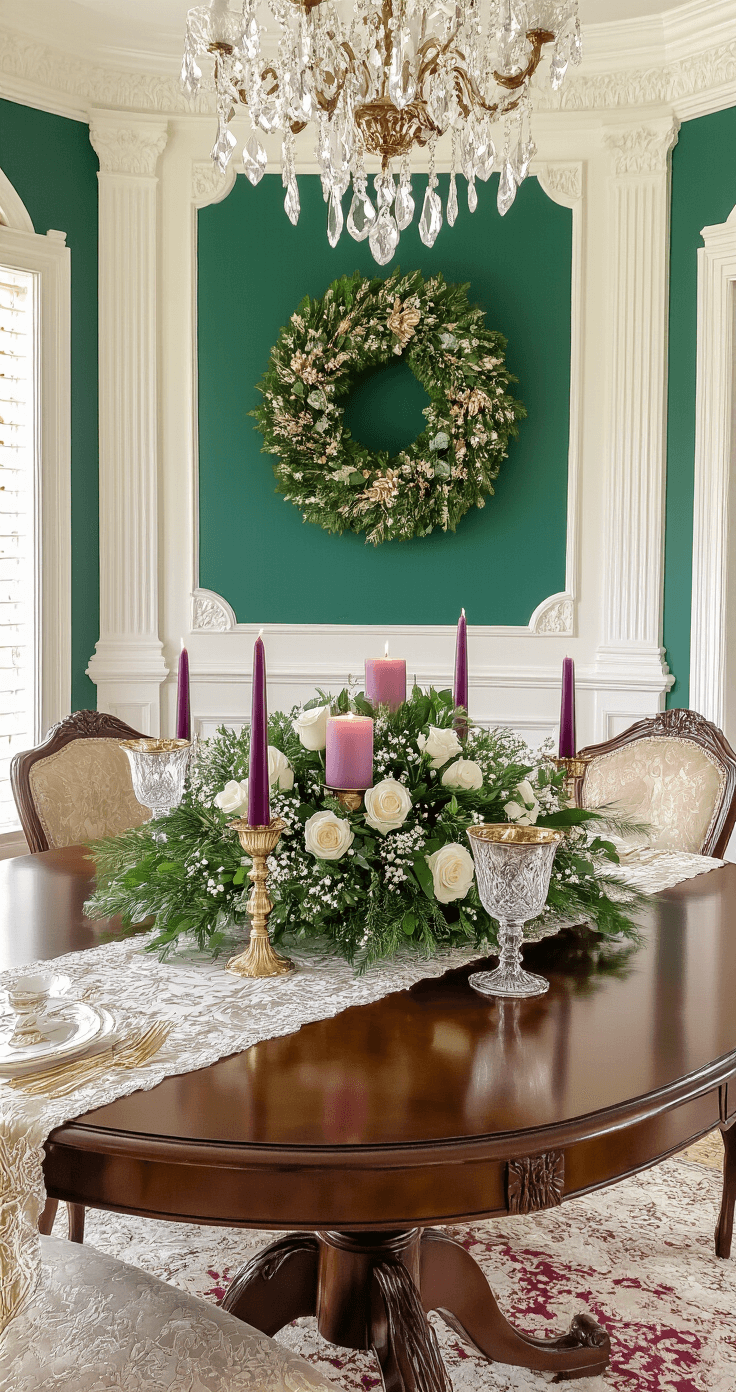
Quick Style Snapshot
Let me be straight with you about what you’re getting into:
- Time needed: 30 minutes if you’re speed-crafting, 2 hours if you’re enjoying wine and Christmas music
- Estimated cost: $15 for the “I’m broke but festive” version to $100+ if you’re going full floral fantasy
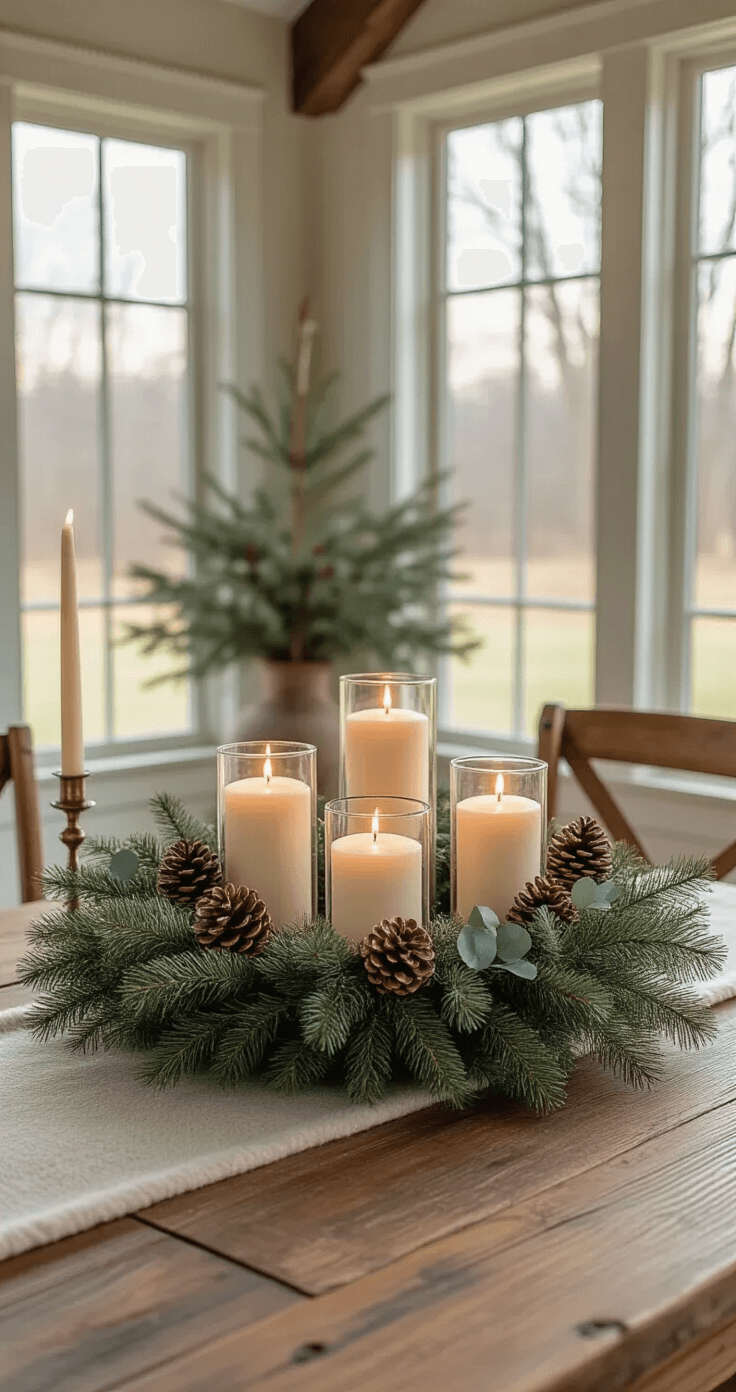
- Size sweet spot: 12-18 inches diameter—big enough to impress, small enough to not knock over during dinner
- Skill level: If you can use a hot glue gun without burning yourself too badly, you’re golden
- When to display: Late November through Christmas Day (then you can retire it with honor)
Why This Works in Any Home
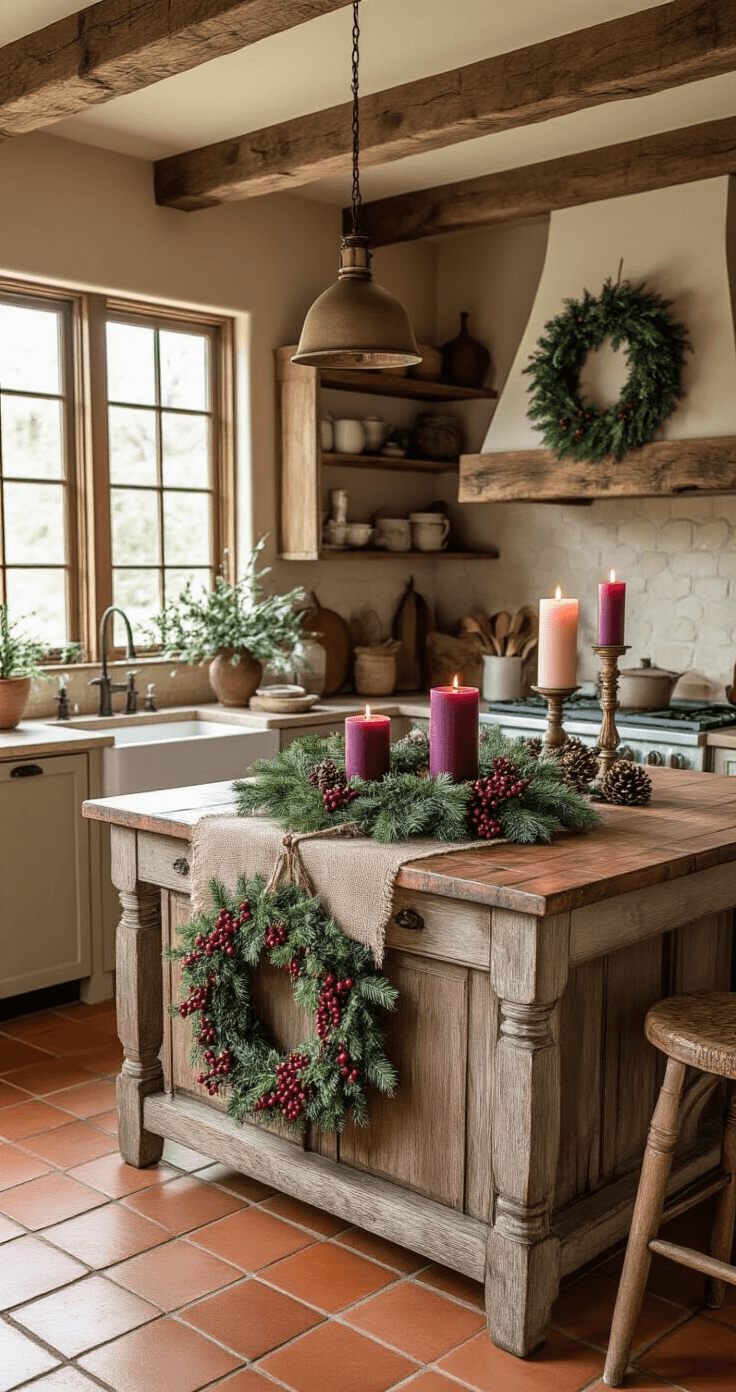
Here’s the beauty of Advent wreaths—they’re style chameleons. Got a farmhouse kitchen with shiplap everywhere? Perfect. Living in a minimalist apartment where everything’s white and wood? Still works. Traditional cottage vibes with chintz and florals? Absolutely nails it.
The core stays the same: circle, four candles, greenery. But how you dress it up? That’s where your personality crashes the party. I’ve seen Advent wreaths that look like they stepped out of a Scandinavian design magazine and others that scream “grandma’s cozy cottage,” and they’re all correct.
What You Actually Need (And What’s Just Nice to Have)
The Non-Negotiables
Let’s start with what you absolutely cannot skip:
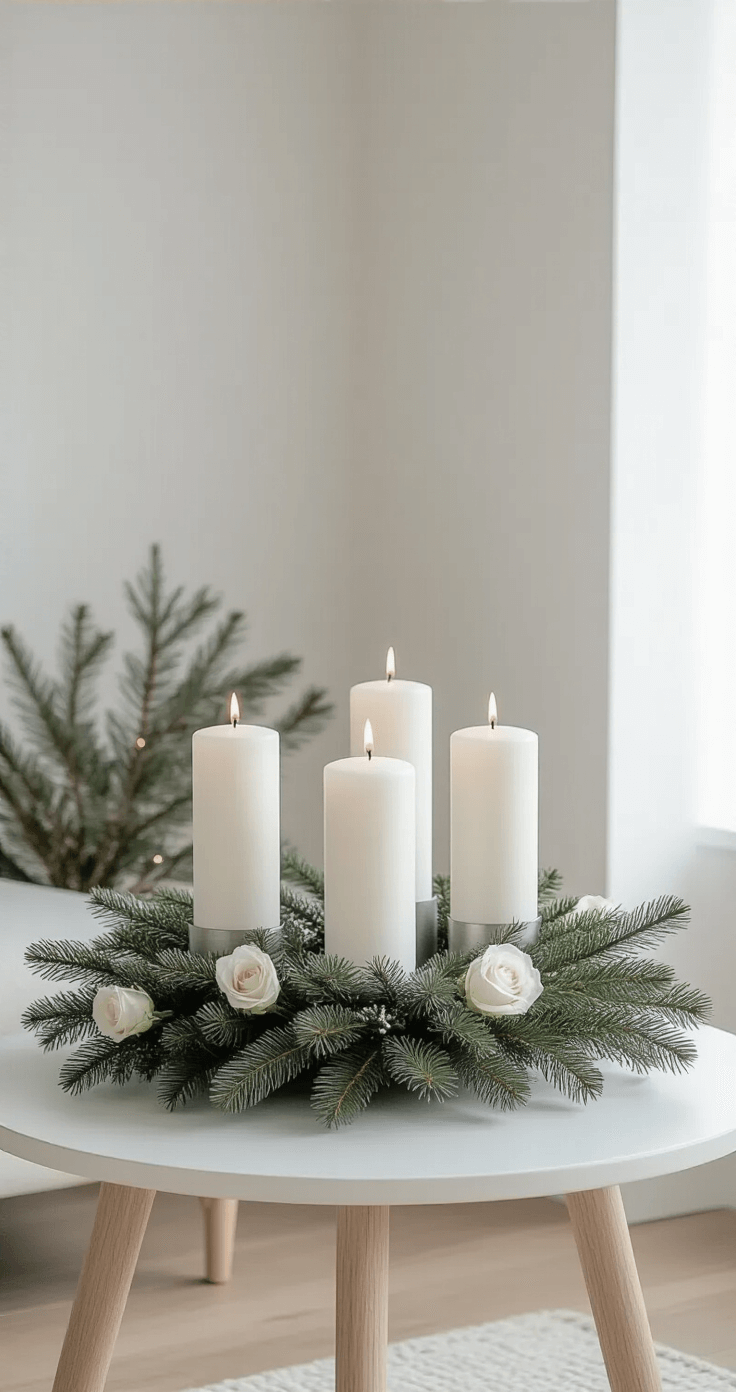
Four candles—and before you grab any random candles from your junk drawer, here’s the traditional setup: three purple or blue ones and one pink or white. The colors aren’t just pretty—they actually mean something in the Advent tradition. But listen, if you only have white candles and it’s December 23rd? Use what you’ve got.
A base structure—this is your foundation, and you’ve got options:
- Styrofoam wreath form (easiest for beginners)
- A flat wooden board or round (my personal favorite for rustic looks)
- Straw wreath base (if you like traditional vibes)
- Wire frame (for the brave souls among us)
Grab a Styrofoam wreath form if you want the path of least resistance.
Greenery—fresh pine branches smell like Christmas threw up in your house (in the best way), but artificial foliage won’t drop needles all over your table for a month. Your call on that domestic battle.
The Stuff That Makes It Pop
Now for the fun part—the accessories that take your wreath from “yeah, that’s nice” to “wait, you MADE that?”
- Texture additions: Wooden stars (very Etsy-chic), Pinecones (free if you take a walk), Berries—fresh or fake, both work
- Winter magic makers: Frosted sprays that make everything look like Narnia, Red berry strands for color pops, Ribbon in colors that don’t make your eyes hurt
- Attachment supplies: Hot glue gun and sticks, Florist wire (the unsung hero of craft projects), Florist tape if you’re getting fancy
The Fancy Pants Upgrades
Want to go full Martha Stewart? Here’s where you level up:
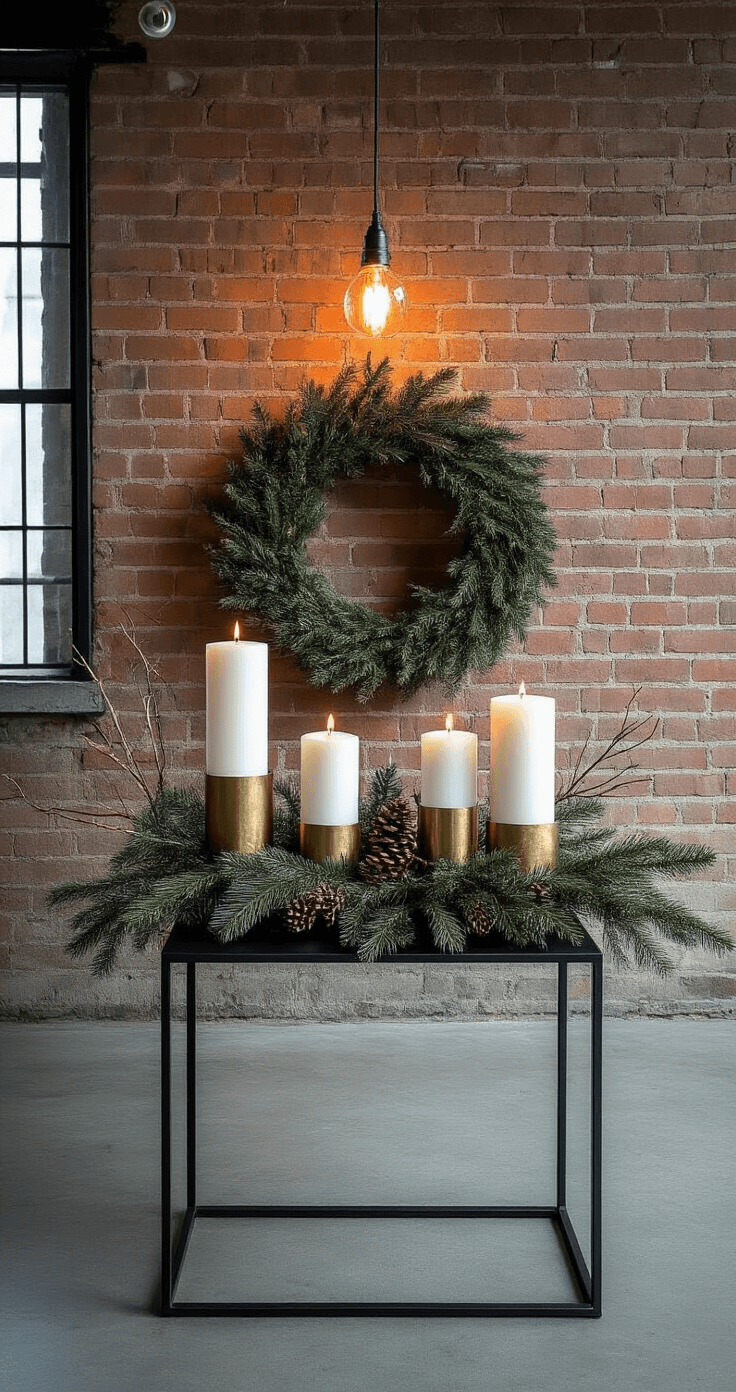
- Candle holders—glass, silver, or gold ones create distance between flame and your carefully arranged pine needles, which is both safer and prettier. Trust me, burnt greenery smells like regret, not Christmas.
- Fresh flowers—white roses, baby’s breath, eucalyptus, and spray roses turn your wreath into something you’d see at a boutique hotel. They’re stunning but high-maintenance, so only commit if you’re ready for that relationship.
- Metallic finishes—gold leaf, silver spray paint, or metallic candles add contemporary edge.
- Natural collected elements—branches, interesting twigs, weathered wood pieces you find on walks. Free, unique, and gives your wreath that “collected over time” look instead of “bought everything at Michael’s in one panicked trip.”
How to Not Screw This Up (Pro Tips)
I’ve made enough mediocre wreaths to know what works:
Layer like you’re making lasagna—start dense with greenery, then add your pretty bits on top.
Keep space around candles—nobody wants a fire hazard centerpiece.
Mix textures—delicate baby’s breath next to chunky pinecones, wispy evergreen branches with sturdy magnolia leaves.
For twig designs: cut branches to about 3 inches, bundle three or four together, then wire them to your base. This creates fullness instead of sad, sparse sticks.
For fresh flowers: condition everything first (cut stems at an angle, let them drink water), and keep your foam base moist throughout the season. Otherwise, you’re documenting floral death in real-time.
Actually Building This Thing
Get Your Workspace Ready
Clear your kitchen table or wherever you craft. Lay out everything—and I mean everything—before you start gluing. There’s nothing worse than hot glue cooling while you hunt for the wire cutters.
Prep your base:
- Drilling holes in Styrofoam for candles
- Securing glass candle holders to a wooden board
- Wrapping straw forms with ribbon
If using fresh branches, let them dry one to two days and brush off the dirt—unless you like forest floor confetti on your table.
Method 1: The Twig Approach (Rustic & Cool)
Start with a wooden board base and position your four glass candle holders evenly. Heat up that hot glue gun. Apply twigs in layers, starting with shorter pieces near the center and building outward. This creates dimension instead of flat sadness. Leave enough clearance around holders so you can actually remove and light the candles without a struggle.
Method 2: Greenery-Wrapped Style (Classic Vibes)
This post may contain affiliate links. Please see my disclosure policy for details.