

Why Your Front Door is Crying Out for a Summer Wreath
Contents
Your front door gets zero love most of the year. It just sits there. Boring. Bland. Begging for attention. A summer wreath fixes that faster than you can say “curb appeal.”
I learned this the hard way when my sister-in-law showed up with this stunning hydrangea creation last June. My door went from forgettable to Instagram-worthy in about thirty seconds. Now I can’t imagine summer without one.

What Makes a Summer Wreath Actually Look Like Summer
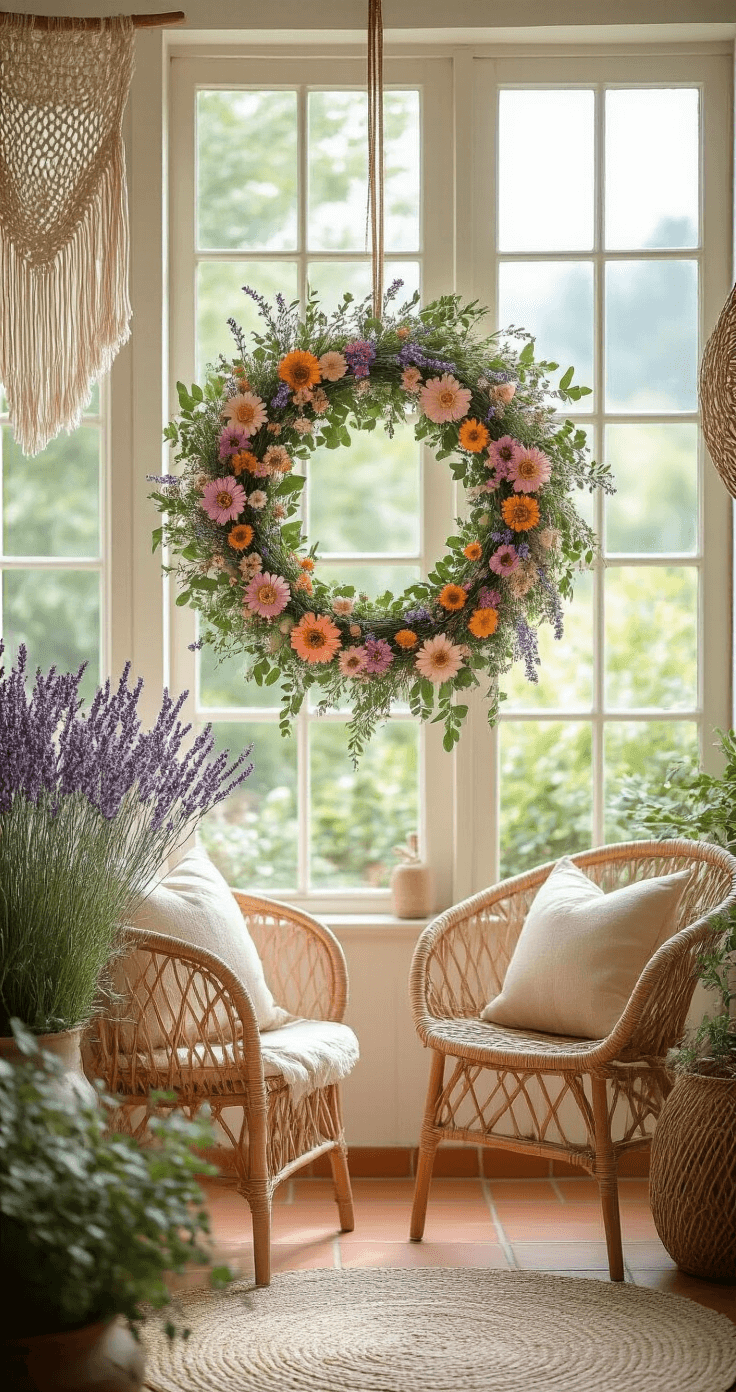
Forget those sad, dried-up things you see wilting on doors in August. Real summer wreaths capture that fresh, vibrant energy that makes this season special.
Flowers that scream summer:
- Sunflowers (obviously)
- Dahlias in those gorgeous jewel tones
- Hydrangeas that look like fluffy clouds
- Zinnias in every color imaginable
- Peonies if you’re feeling fancy
- Daisies for that cheerful cottage vibe
- Lavender that actually smells amazing
I’m partial to sunflowers myself—they’re impossible to mess up and they make everyone happy.

The foundation matters:
Start with either a grapevine wreath base or a wire wreath frame. Grapevine gives you that natural, rustic look. Wire frames work better when you’re going for something more structured or modern.
The Coastal Wreath That Brings Beach Vibes Home
Living nowhere near the ocean hasn’t stopped me from creating beach-themed wreaths. These beauties transport you straight to the shoreline:
Essential coastal elements:
- Shells (raid your vacation stash or grab some online)
- Starfish in various sizes
- Sea glass for that weathered, romantic look
- Driftwood or whitewashed twigs
- Rope or jute for texture
I made one last year using artificial seashells from Amazon and some leftover burlap ribbon. Cost me maybe fifteen bucks. Everyone who saw it assumed I’d paid a fortune at some fancy coastal boutique.

Pro tip:
Keep the color palette to whites, creams, soft blues, and natural browns. The restraint makes it look expensive and intentional rather than craft-store explosion.
Farmhouse Summer Wreaths That Never Go Out of Style
The farmhouse aesthetic just works for summer. It’s relaxed. Welcoming. Unpretentious.
What makes a wreath scream farmhouse:
- Wagon wheel or wooden hoop bases
- Galvanized metal accents
- Burlap everything
- Small terracotta pots with succulents
- Checkered or gingham ribbons
- Butterfly picks scattered throughout
I attached three mini clay pots to a grapevine wreath last summer and stuck fake succulents in them. Ridiculously easy. The pots stayed put with hot glue, and the whole project took about forty minutes while I caught up on a podcast.
Garden-themed variations:
Glue old seed packets to a foam wreath form. Add some artificial greenery around the edges. Boom—you’ve got a gardener’s dream wreath. I’ve seen people attach actual garden tools (mini ones) to these wreaths. It sounds weird but looks amazing.
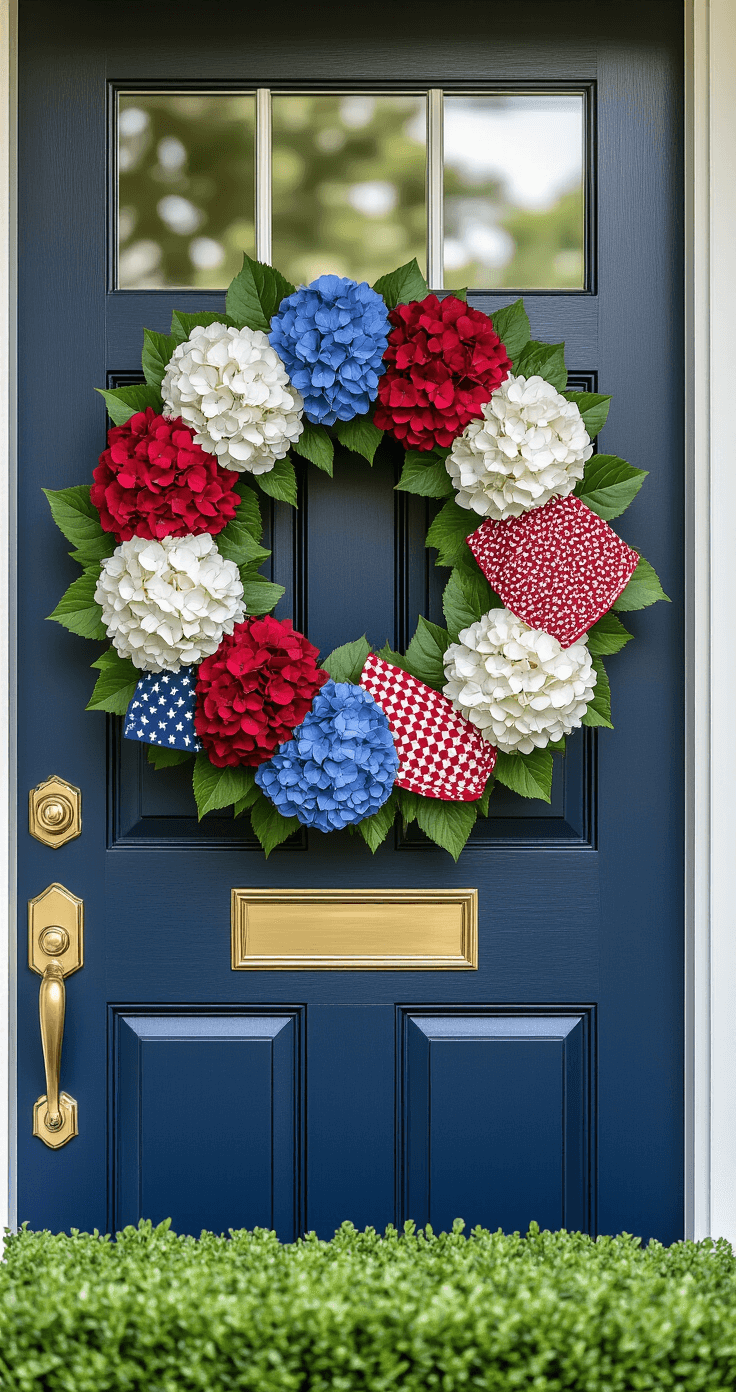
Patriotic Wreaths That Don’t Look Tacky
July rolls around and suddenly everyone’s scrambling for red, white, and blue decorations. Most look like a flag threw up on your door. Here’s how to do patriotic without the cheese:
Sophisticated approaches:
- Use bandanas instead of cheap ribbon (seriously, this changes everything)
- Paper straws in patriotic colors arranged in a sunburst pattern
- Stick to ONE pop of color against neutral backgrounds
- White hydrangeas with subtle blue ribbon
- Natural grapevine with small flag picks tucked in sparingly
The bandana trick is my secret weapon. A couple of red bandanas wrapped around sections of a wreath look intentional and stylish rather than party-store desperate. You can find bandanas anywhere for about a dollar each.

Actually Making the Thing (It’s Easier Than You Think)
I’m not naturally crafty. I once hot-glued my finger to a picture frame. But summer wreaths? I can knock these out faster than my husband can decide what to watch on Netflix.
Your basic construction process:
Step 1: Choose your base
Grapevine for rustic and natural. Foam or wire for everything else.
Step 2: Plan your layout (sort of)
Lay everything out on your table first. See what looks good together. This prevents the “why did I hot glue that there” regrets.
Step 3: Attach the background elements
Start with your greenery or base layer. Use floral wire for anything you might want to adjust later. Hot glue for stuff you know is staying put.
This post may contain affiliate links. Please see my disclosure policy for details.


