
Why Most Outdoor Christmas Displays Fall Flat (And How Yours Won’t)
Here’s what nobody tells you: outdoor Christmas decorating isn’t about quantity. It’s about strategic placement, layering, and knowing which three zones actually matter.
Most people start randomly—a string of lights here, an inflatable there—and wonder why it looks messy instead of magical.
The three zones that transform everything:
– Roofline/vertical surfaces (your primary visual anchor)
– Pathways and ground level (safety meets style)
– Focal statement pieces (where eyes naturally land)
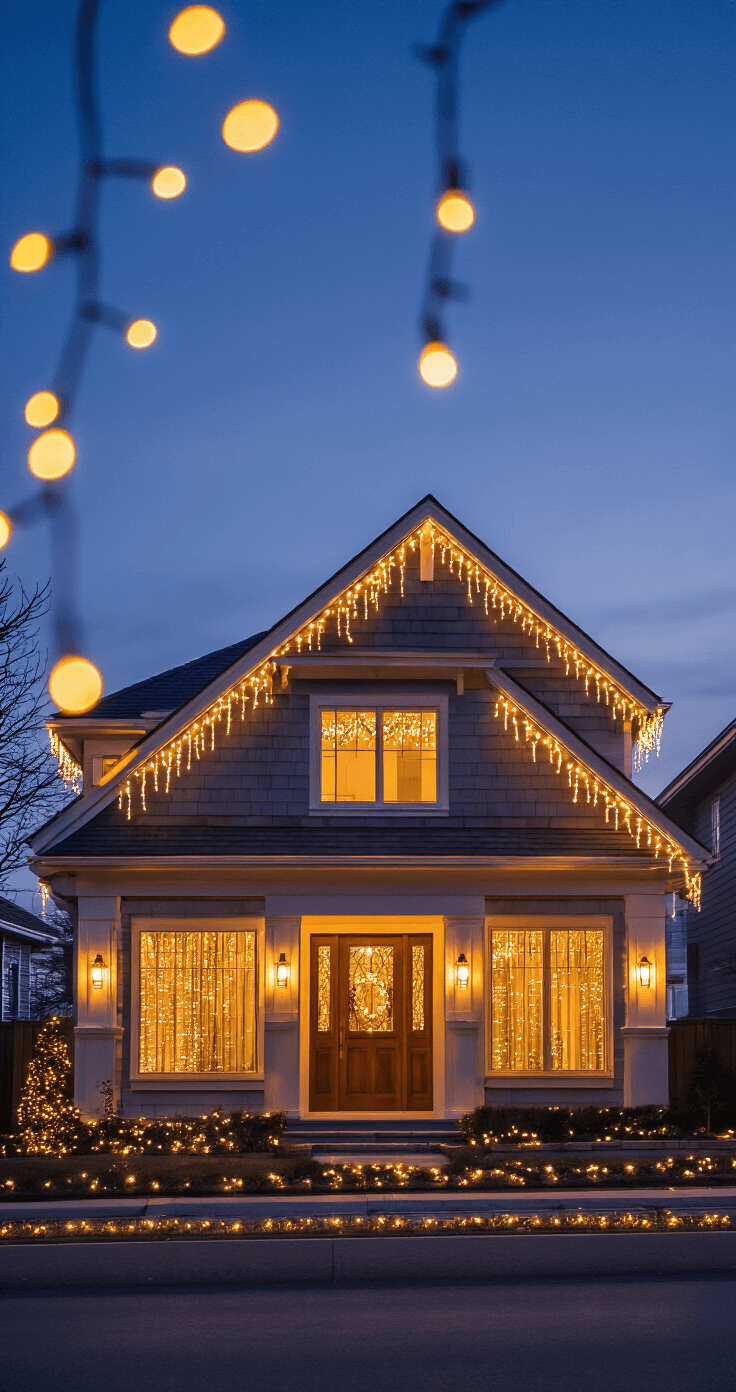
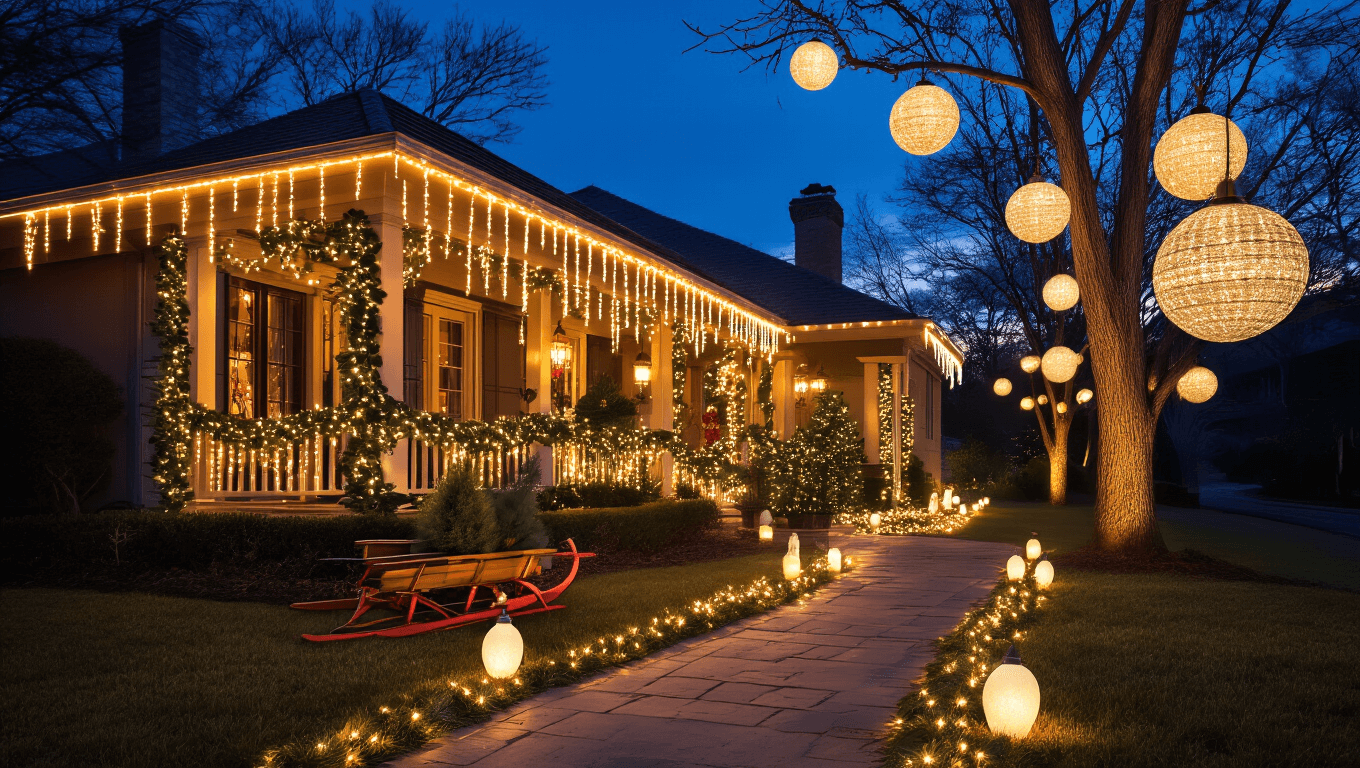
Start With Your Biggest Visual Punch: Roofline Strategy
I always begin with the roofline because it’s what people see from the street. No roofline presence means your entire display gets ignored, no matter how fancy your yard ornaments are.
Your roofline options:
Traditional C9 bulbs: These chunky vintage-style bulbs create that classic Christmas look your parents remember. They’re visible from blocks away and scream “we went all out” without actually requiring you to go all out. Grab C9 LED Christmas lights in warm white for timeless appeal or multicolor if you’re feeling nostalgic.
Icicle lights: Perfect for creating that “frozen in time” effect along roof edges and window frames. I prefer these when going for elegant over festive. The cascading effect makes your home look like it belongs in a snow globe, even if you live in Florida.
The combo approach: Here’s my favorite trick—use C9 bulbs along the main roofline, then add icicle lights along lower edges, awnings, and window tops. This layering creates depth that single-type installations never achieve.
Pro reality check: If your roof makes you nervous (it should), hire this part out. A broken leg isn’t festive, and most lighting pros charge $200-400 for standard installations. Worth every penny for your safety and their insurance.
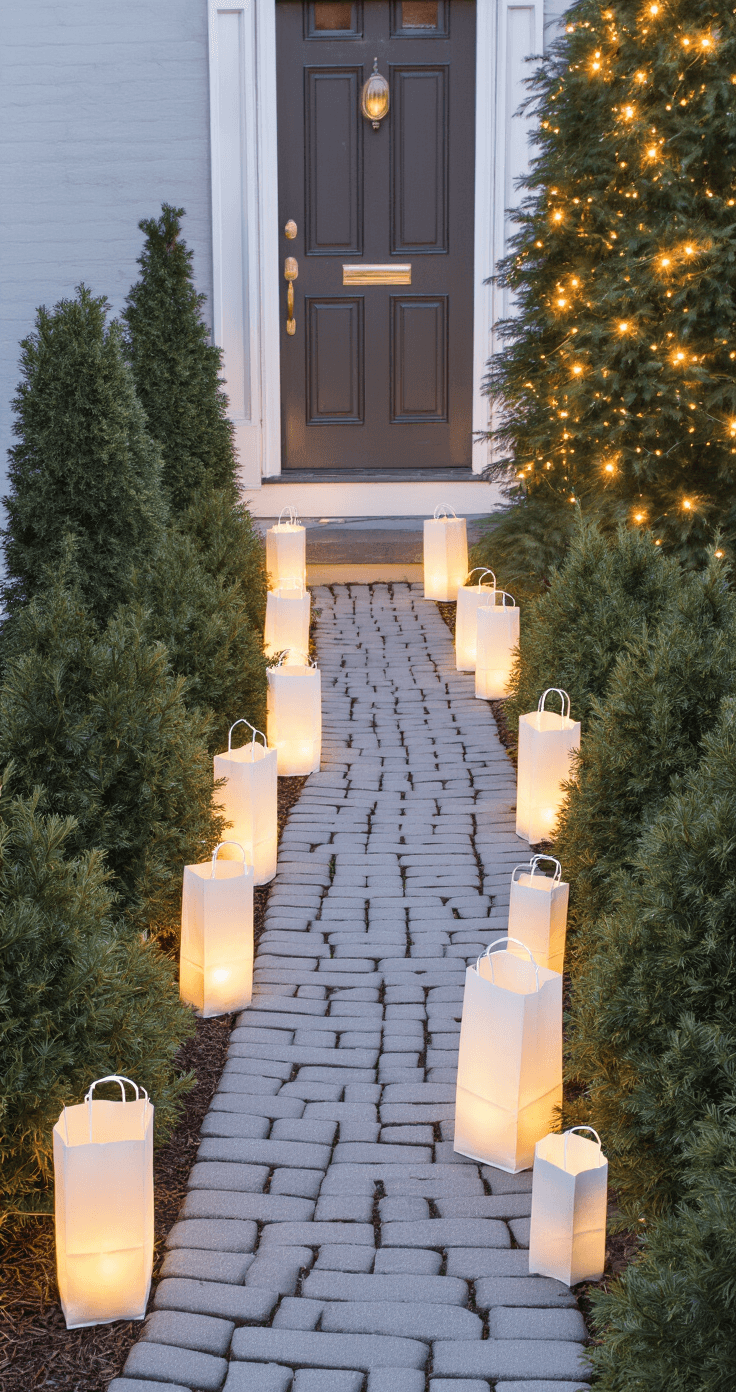
Pathways That Guide Visitors (And Look Incredible Doing It)
Pathway lighting solves two problems simultaneously—safety and style. Nobody wants Aunt Martha breaking an ankle on your dark driveway during Christmas dinner.
I discovered something counterintuitive: you can skip roof lights entirely if you nail pathway lighting. The ground-level glow creates such dramatic impact that people assume you decorated everything.
Pathway lighting approaches:
Staked C7/C9 lights: Plant these along driveways and walkways every 3-4 feet. The classic approach that never fails. Use outdoor light stakes to keep everything stable against wind and weather.
Globe pathway lights: These create a whimsical, less traditional vibe—perfect if you’re tired of seeing the same old displays year after year.
Luminarias: My secret weapon for budget-friendly elegance. Paper bags, sand, and battery-operated candles (never real flames outdoors). Costs under $30 for a stunning 50-foot pathway.
Here’s my exact staking pattern: Start 2 feet from your doorway, then every 3 feet along curves and 4 feet on straight runs. This rhythm guides eyes naturally toward your entrance.
Tree and Bush Lighting: Where Amateurs Waste Hours
Most people wrap lights around the outside of bushes and trees, which looks flat and disappointing. The trick is working **inside the branches**.
String mini LED lights throughout interior branches of evergreens to create that magical inner glow. The depth this creates is stunning.
For bushes and shrubs: Forget individual light placement. Grab net lights instead. Drape them over the top, adjust for coverage, done. What would take 45 minutes per bush now takes five.
Color coordination matters more than you think: Pick warm white, cool white, OR multicolor—then stick with it across everything. Mixed color temperatures look confused, not festive.

Statement Pieces That Stop Traffic (In a Good Way)
Now we get to the fun stuff—those jaw-dropping focal points that make people slow down.
Light show trees: These pre-programmed animated trees are absolute game-changers. Multiple light patterns, no programming required, just plug in and wow. Available from 5 to 12 feet tall. I position mine flanking my driveway entrance—creates an instant “arrival moment.”
Christmas light balls: These folding spheres range from 8 inches to 37 inches in diameter. Hang them from tree branches at varying heights for dimensional interest. The best part? They fold flat for storage, unlike those inflatable disasters that take up half your garage.
Lighted snowflakes: Available in 20-inch to 48-inch sizes, these work everywhere—porches, tree branches, fence railings, barn siding. I hang three different sizes from my oak tree at staggered heights. Creates movement even when there’s no wind.
Oversized ornaments: Large, UV-resistant yard ornaments anchored on your front lawn or porch create immediate visual impact. These draw attention from the street and give your display a cohesive focal point.
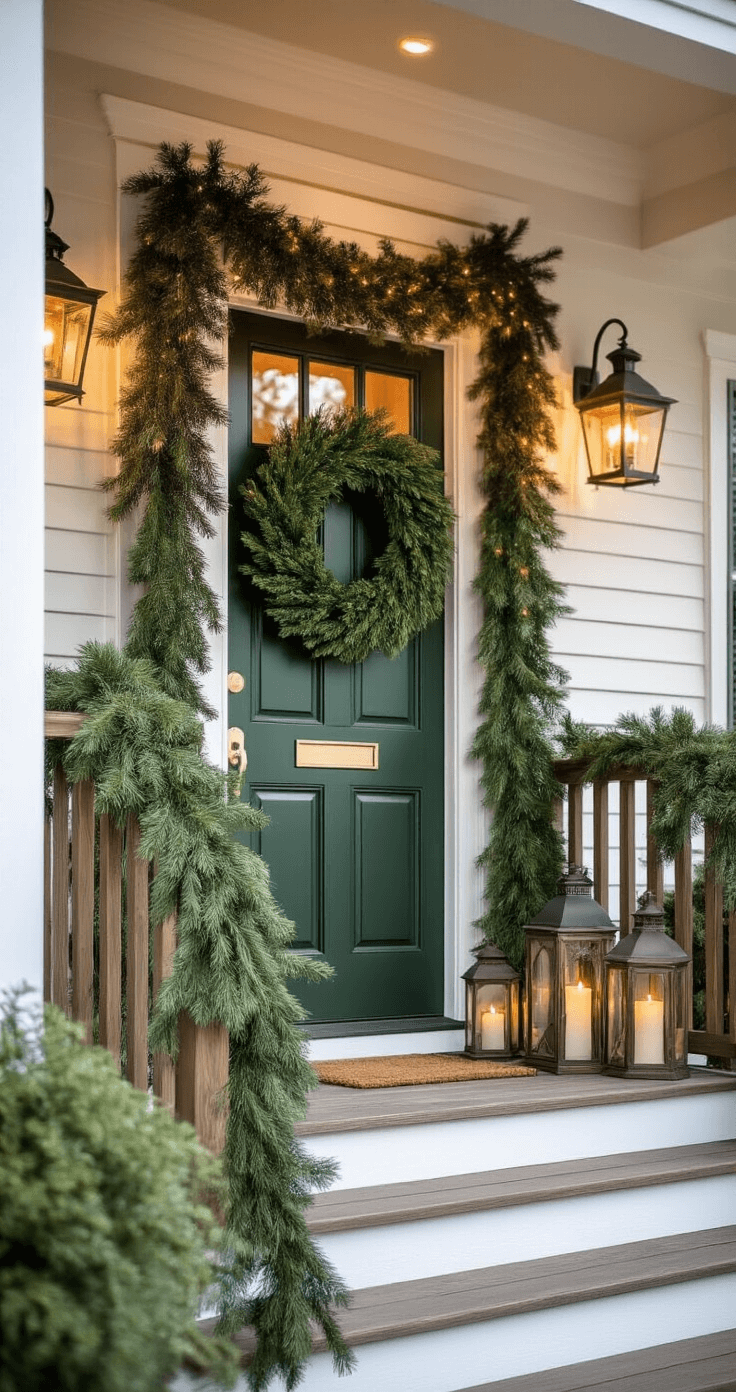
Natural Elements That Elevate Everything
Here’s what separates amateur displays from magazine-worthy setups: mixing artificial with organic elements.
Pure plastic looks cheap. Pure natural requires constant maintenance. The blend looks intentional and expensive.
My layering formula:
– Start with a prelit garland base along railings and fences
– Weave in fresh magnolia branches (they last weeks)
– Add sugar pine cones, juniper berries, and dried eucalyptus
– Finish with velvet ribbon bows at connection points
This combination lasts the entire season while looking fresh and smelling incredible.
Wreaths on everything: Don’t limit wreaths to your front door. Hang matching ones on windows, fence posts, and garage doors. This repetition creates cohesive flow without looking repetitive.
Old sleds and vintage touches: I lean an antique sled against my porch with a galvanized bucket containing a small potted evergreen. Cost? $12 at a thrift store. Impact? Priceless.
Budget-Friendly DIY Tricks That Look Custom
You don’t need a massive budget to create high-end impact. You need strategy and a few clever shortcuts.
DIY light balls: Wrap LED mini lights around chicken wire spheres secured with wire. Costs about $8 per ball versus $40-60 for pre-made versions. Takes 20 minutes each.
Basketball pole light tree: Use a standard basketball pole base, attach gutter hooks at intervals, stake light strings around in a cone shape, alternate twinkling and steady bulbs. Creates a dramatic 10-foot lighted tree for under $75.
Wooden block trees: Stack and glue different-sized wooden blocks (2×4 cuts) into tree shapes, paint white, add small LED lights. Adorable porch displays that store easily.
Cinder block luminarias: Stack cinder blocks in columns, place battery candles inside the openings. Modern, architectural, costs almost nothing.
This post may contain affiliate links. Please see my disclosure policy for details.


