

How to Make Homemade Wreaths That Don’t Look Like a Pinterest Fail
Contents
Homemade wreaths start with three non-negotiables: a sturdy base, fresh or dried materials, and the guts to stick things together until they look intentional.
I’ve made wreaths that belonged on magazine covers and wreaths that looked like a bird’s nest had a nervous breakdown.
The difference wasn’t talent—it was knowing which shortcuts work and which ones leave you hot-gluing pinecones at 11 PM, questioning your life choices.

Why Your First Wreath Probably Won’t Be Instagram-Worthy (And Why That’s Fine)
Listen, nobody nails wreath-making on the first try.
You’ll use too much wire or not enough.
Your eucalyptus will stick out at weird angles like it’s trying to escape.
The foam base will show through in patches that scream “amateur hour.”
But here’s the thing—by wreath number three, you’ll have the muscle memory down, and by wreath number five, people will ask if you bought it from that fancy boutique downtown.

What You Actually Need (Not the 47-Item Supply List)
The Base: Pick Your Fighter
Wreath wire frames are the classic choice for a reason.
They’re sturdy, they last forever, and they give you that professional-looking structure.
Foam wreath forms are easier for beginners because you just stab things into them.
No wire-wrapping PhD required.
Grapevine wreath bases bring instant rustic vibes and hide mistakes beautifully because they’re already textured and messy-looking.
The Stuff That Holds It Together
- Floral wire in 22 or 24 gauge (the paddle kind saves you from untangling nightmares)
- Wire cutters that actually cut instead of mangling
- Bypass pruners for branches (not your kitchen scissors, please)
- Hot glue gun for when you’re desperate or adding ribbons
The Pretty Stuff
Fresh greenery:
- Eucalyptus (smells amazing, dries beautifully)
- Cedar branches (texture for days)
- Pine or fir (classic holiday vibes)
- Boxwood (stays green forever)
Dried materials:
- Wheat stalks
- Lavender bundles
- Preserved leaves
- Baby’s breath
The accessories:
- Pinecones you found on a walk (free decorating)
- Berries (fake ones won’t shrivel)
- Ribbon
- Whatever weird interesting thing you spotted at the craft store

The Method That Actually Works
Step 1: Cut Everything Before You Start
I learned this the hard way after trying to cut, hold, and wire simultaneously like some kind of craft octopus.
Cut your greenery into 4-6 inch pieces.
Make a pile.
Resist the urge to start attaching things immediately.
Step 2: Make Little Bouquets
Grab 2-3 stems of different textures.
Hold them together like a tiny bouquet.
This is your building block.
If you try to attach single stems, you’ll be there until Christmas 2025.
Step 3: Wire Like Your Wreath’s Life Depends On It
Because it does.
Lay your bouquet on the base with stems pointing clockwise (or counterclockwise—just pick one and stick with it).
Wrap the wire around the stems and base 2-3 times.
Pull it tight.
Not “I’m being gentle with delicate flowers” tight—”I’m securing cargo to a roof rack” tight.
Step 4: Overlap Like You’re Making Armor
Place your next bouquet so the greenery covers the stems of the previous one.
Wire it down.
Keep going around the circle.
The overlapping is what makes it look full instead of like a sad toupee.
Step 5: Deal With the Awkward Ending
You’ll reach the point where you’re trying to tuck the last bouquet under the first one.
This is where people panic.
Just lift up the greenery of your first bouquet, slide the stems of your last one underneath, and wire everything down.
Add extra stems if there are gaps.
Nobody will know you made adjustments.
Wreath Types For Every Personality
The “I Want to Look Fancy But I’m Lazy” Wreath
Single-variety eucalyptus wreath.
That’s it.
Buy a bunch of eucalyptus, make it into a wreath using the method above.
It looks expensive and intentional.
People will think you’re sophisticated.
The “I Forage” Wreath
Go outside.
Collect interesting branches, dried grasses, seed pods, interesting weeds that aren’t actually weeds but native plants.
Wire them onto a grapevine base.
Congratulations, you’re earthy and connected to nature.
The “Martha Stewart Would Approve” Wreath
Lush mix of cedar, pine, and eucalyptus.
Add clusters of pinecones wired onto floral picks.
Tuck in some berry stems.
Finish with a massive bow that could double as a small parachute.
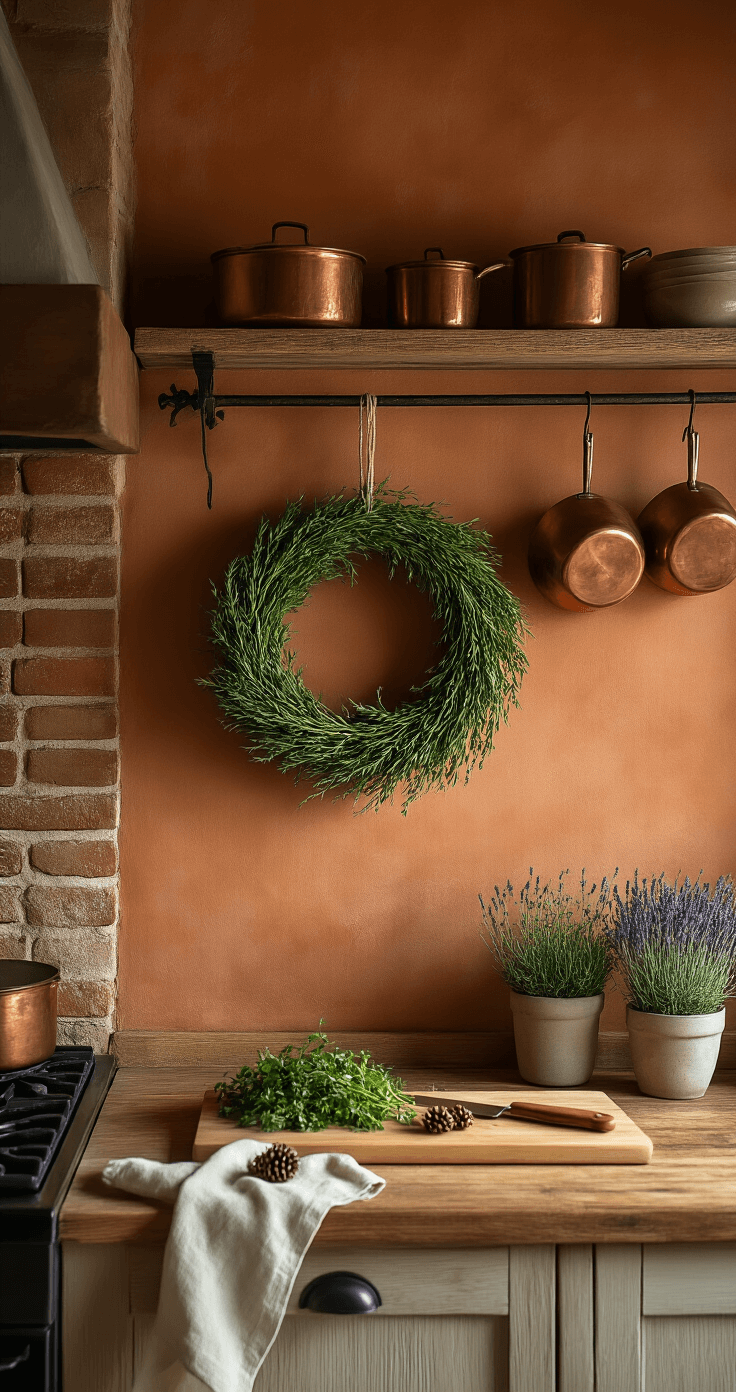
The Herb Wreath That Actually Serves a Purpose
Rosemary, sage, thyme, oregano, bay leaves.
Wire them onto a base.
Hang it in your kitchen.
Pluck herbs when cooking.
Feel like a medieval apothecary.

This post may contain affiliate links. Please see my disclosure policy for details.


