

DIY Holiday Wreaths: Everything You Need to Create Stunning Front Door Decor
Contents
- DIY Holiday Wreaths: Everything You Need to Create Stunning Front Door Decor
- Why Your Front Door Needs This (And Why You Should Make It Yourself)
- The Supplies That Actually Matter (And the Ones That Don’t)
- The Dollar Store is Your New Best Friend
- Getting Your Supplies Organized (So You Don’t Want to Scream Later)
- The Go-To Kit Method (This Changed Everything For Me)
- Building Your First Wreath (The Basic Formula)
DIY holiday wreaths transformed my front door from boring to brilliant, and I’m going to show you exactly how to make your own without spending a fortune or losing your mind in the process.
Look, I get it. You’re scrolling through Pinterest, seeing these gorgeous wreaths, and thinking “I could never make that.” Or maybe you’re worried about dropping a hundred bucks on supplies only to end up with something that looks like a craft store exploded.
I’ve been there. My first wreath looked like a bird’s nest had a fight with a ribbon factory. But here’s the thing—once you understand the basics, this becomes ridiculously easy.
Why Your Front Door Needs This (And Why You Should Make It Yourself)
Store-bought wreaths cost anywhere from $50 to $200. The ones at reasonable prices look cheap. The beautiful ones cost more than your grocery budget.
Making your own means you get exactly what you want for a fraction of the price. Plus, you can remake it every season with the same base supplies.
I made my first wreath three years ago. That same grapevine wreath form is still going strong, dressed up differently for each holiday.
The Supplies That Actually Matter (And the Ones That Don’t)
Let me save you some money right now.
The Non-Negotiables:
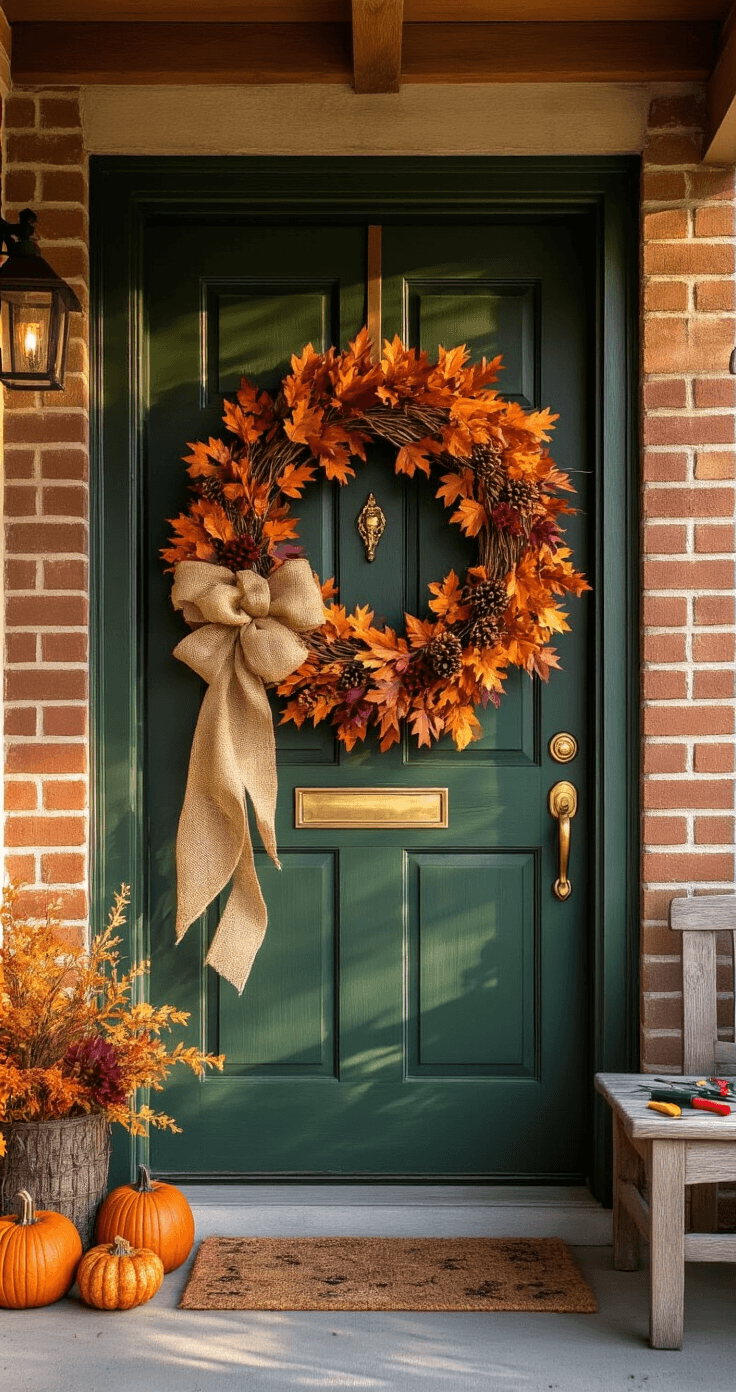
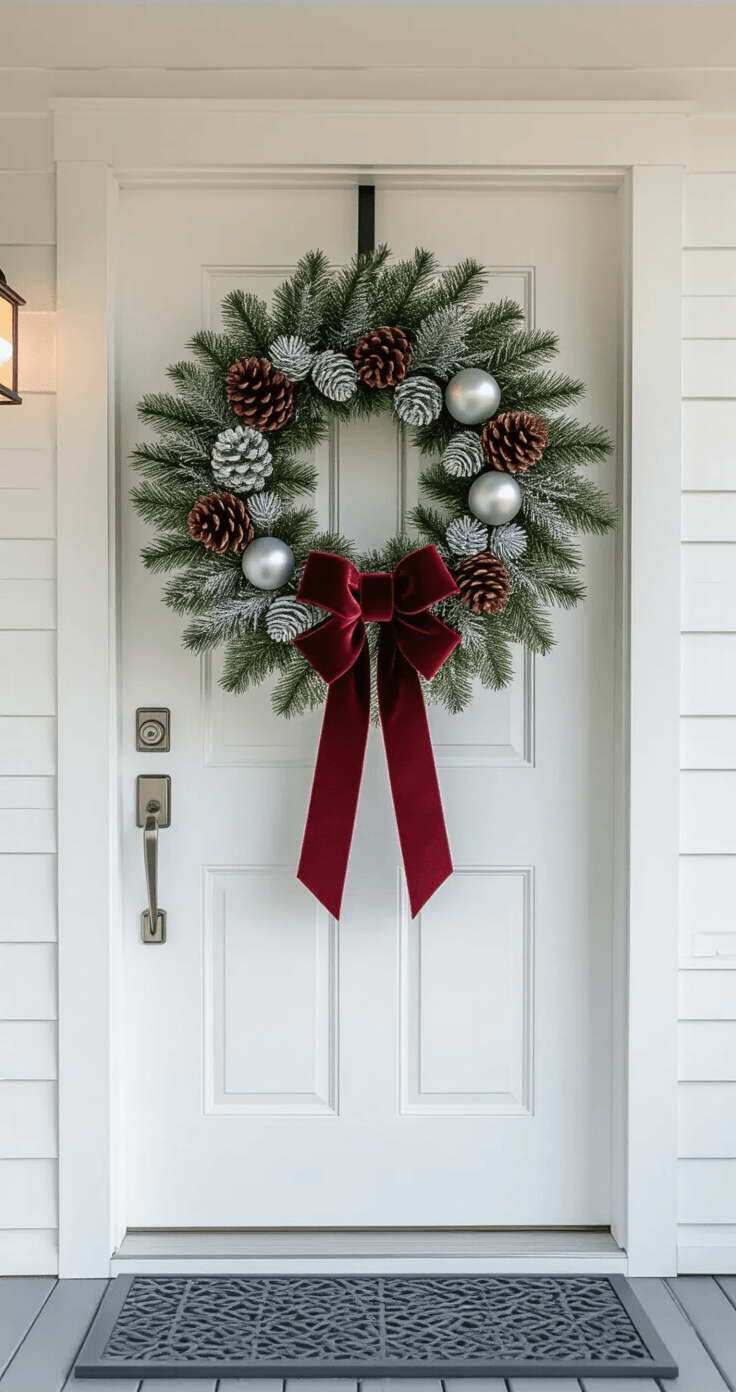
- Wreath base – Wire frames work for fuller designs, foam bases are perfect for beginners, and grapevine wreath bases give you that rustic look everyone loves
- Hot glue gun – Skip the craft store markup and grab a reliable hot glue gun online
- Floral wire – This is your security blanket when glue isn’t enough
- Wire cutters – Regular scissors will make you want to quit
The Fun Stuff:
- Artificial flowers and greenery (pick what matches your style)
- Ribbons in various widths
- Seasonal picks and ornaments
- Deco mesh if you want that full, professional look
What You Can Skip:
Expensive floral tape. Fancy storage systems (at first). Pre-made bows that cost $15 each.
The Dollar Store is Your New Best Friend
I spend about 70% of my wreath budget at Dollar Tree. Not kidding.
What to grab there:
- Wreath forms (seriously, they’re $1.25)
- Seasonal decorations and picks
- Floral foam if you need it
- Basic floral wire
- Ribbons (hit or miss, but check every visit)
- Unexpected materials like tablecloths or shelf liners you can cut up
What to buy elsewhere:
- Your hot glue gun and quality glue sticks
- Premium ribbons for the focal points
- Specialty items like high-end ornaments
I grabbed a plaid tablecloth from Dollar Tree last Christmas, cut it into strips, and used it as ribbon. Cost me $1.25 instead of $20 for wired plaid ribbon. Nobody could tell the difference.
Getting Your Supplies Organized (So You Don’t Want to Scream Later)
Here’s where most people mess up. They buy all this stuff, toss it in a bin, and then can’t find anything when inspiration strikes.
My system that actually works:
Create four main categories:
Category 1: Wreath Bases
Store these flat or hanging on hooks. Label each with what season/holiday you’ve used it for before.
Category 2: Floral Supplies
Clear stackable storage bins are worth the investment here. Separate by color or season. I have one bin for “fall/harvest” florals and another for “winter/evergreen.”
Category 3: Ribbons and Accents
This is where things get messy fast. Roll ribbons onto cardboard pieces or use clothespins to keep them from unraveling. Store ornaments and picks in divided containers.
Category 4: Tools
Keep your hot glue gun, wire cutters, scissors, and floral wire together. I use a small plastic caddy that I can carry to wherever I’m crafting.
The secret weapon:
Label everything with both pictures and text. When you’re in the zone, you don’t want to open six bins looking for that one perfect ribbon.
The Go-To Kit Method (This Changed Everything For Me)
Before I start any wreath project, I create what I call a “go-to kit.”
Here’s how it works:
Step 1:
Decide on your holiday or theme
Step 2:
Pull your wreath base
Step 3:
Gather ALL the florals, ribbons, and accents you might use
Step 4:
Put everything in one container or on one table
Step 5:
Now you can actually design without interruption
This sounds simple, but it’s revolutionary.
Before I did this, I’d be halfway through a wreath, realize I needed more greenery, dig through my bins, get distracted by other materials, and end up starting three different wreaths without finishing any of them.
Now I finish a wreath in one sitting.

Building Your First Wreath (The Basic Formula)
Start with this foolproof structure:
The Foundation Layer:
This post may contain affiliate links. Please see my disclosure policy for details.


