

Felt Flower Wreaths: Your Complete Guide to Creating Stunning No-Sew Door Decor
Contents
Felt flower wreaths have completely changed how I think about seasonal decorating, and I’m about to show you why these gorgeous handmade pieces deserve a spot on your door.
I used to drop $60+ on store-bought wreaths that would wilt, fade, or fall apart after one season. Then I discovered felt flowers, and honestly, I haven’t looked back.

🎨 Steal This Look
- Paint Color: Sherwin-Williams Tricorn Black SW 6258
- Furniture: narrow console table with drawer for mail and keys, positioned against the entry wall beneath a statement mirror
- Lighting: oversized seeded glass pendant with aged brass hardware, hung centered in the foyer
- Materials: matte black metal door hardware, natural jute rug with subtle geometric pattern, reclaimed wood accent wall, hammered copper boot tray
There’s something deeply satisfying about opening your door to a wreath you made yourself—it signals to every visitor that this home is tended by hands, not just purchased from a shelf.
Why I’m Obsessed With Felt Flower Wreaths (And You Will Be Too)
Let me be straight with you. These wreaths check every box I have for home decor projects.
No sewing required – just a hot glue gun and some patience. Budget-friendly – I made my first wreath for under $15. Reusable forever – store them properly and they’ll last for years. Customizable – match any color scheme in your home.
The flowers I made for my fall wreath last year? I pulled them off, rearranged them with different colors, and now they’re my spring wreath. That’s the kind of versatility that makes my wallet happy.

💡 Steal This Look
- Paint Color: Benjamin Moore Simply White OC-117
- Furniture: A vintage-inspired wooden console table with turned legs, painted in a soft sage green for displaying seasonal wreaths
- Lighting: A brass swing-arm wall sconce with a linen drum shade positioned above the display area
- Materials: Wool felt in varying weights, grapevine wreath base, burlap ribbon for hanging, and a distressed wood mantel ledge
There’s something deeply satisfying about a craft project that doesn’t demand perfection—my first felt wreath had lopsided roses and visible glue strings, and I still hung it proudly because I made it with my own two hands.
Everything You Actually Need (No Fancy Stuff)
I learned the hard way that you don’t need a craft store’s entire inventory. Here’s what actually matters:
The Must-Haves:
- Felt sheets in 5-8 colors (I go for 9×12 inch sheets)
- Embroidery hoop or wire wreath form (8-12 inches works perfectly)
- Hot glue gun with plenty of glue sticks
- Sharp fabric scissors (don’t use your kitchen shears, trust me)
The Nice-to-Haves:
- Pinking shears for those zigzag edges
- Flower templates (I trace cookie cutters when I’m lazy)
- Wire cutters if you’re working with a wire base
★ Steal This Look
- Paint Color: Farrow & Ball Skylight 205
- Furniture: a simple white IKEA MALM desk or vintage wooden kitchen table with good task lighting overhead
- Lighting: adjustable-arm architect’s desk lamp with daylight LED bulb
- Materials: matte wool-blend felt, unfinished wood embroidery hoops, brass wire wreath forms, linen storage bins
This is the room where you’ll lose track of time, fingers slightly burned from hot glue, completely absorbed in the satisfying repetition of petal after petal—embrace the mess, it means you’re making something real.
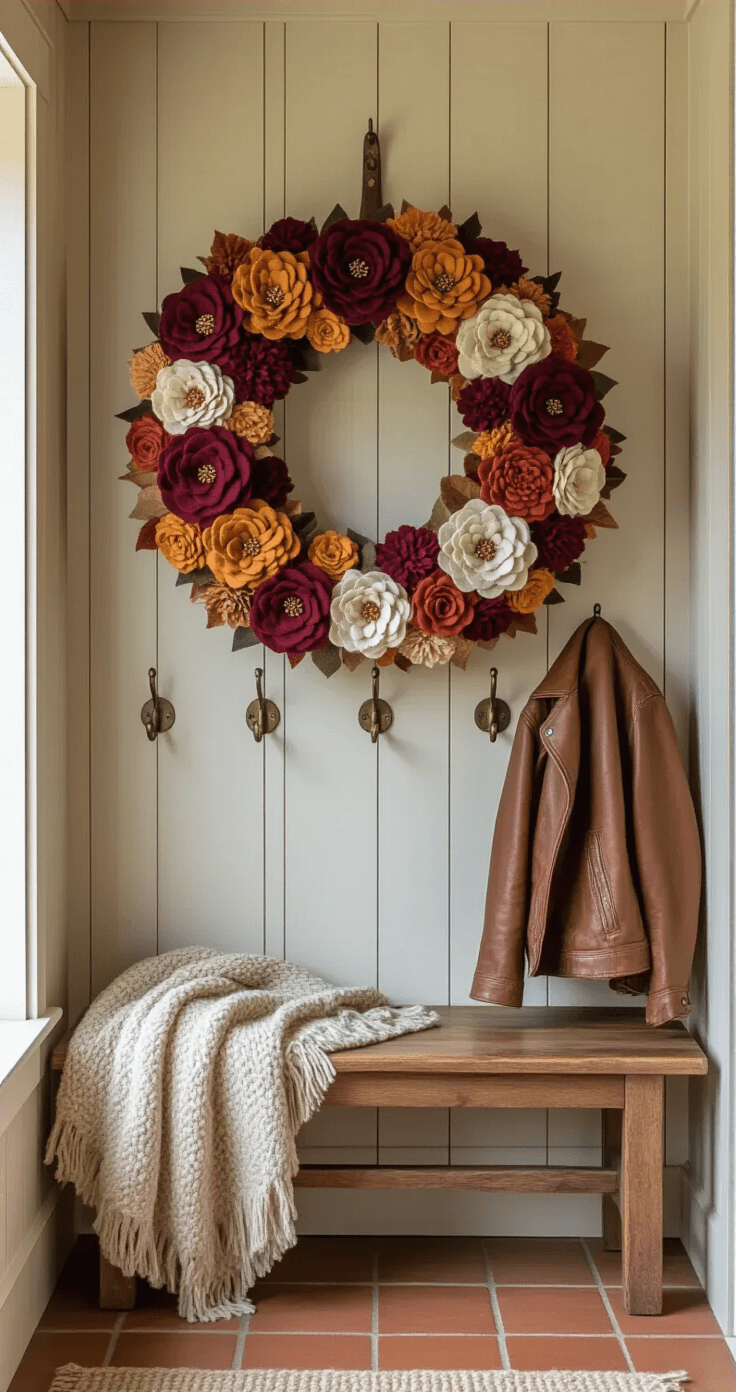
The Flowers That’ll Make Your Wreath Pop
I’ve made probably 20 different wreaths at this point. These five flower types show up in almost every single one.
Spiral Roses (The Easy Show-Stoppers)
Cut a circle about 4 inches across. Draw a spiral from the outside edge toward the center. Cut along that spiral line. Roll the felt strip starting from the outer edge, adding hot glue as you go.
Pro tip: Keep the bottom flat while the top gets loose and natural-looking.
Fluffy Mums (Volume For Days)
Cut a felt strip about 2 inches wide and 12 inches long. Fold it in half lengthwise. Make tiny cuts along the folded edge, stopping about 1/4 inch from the bottom. Roll it up tight while gluing the uncut edge.
These give you that full, textured look that fills space beautifully.
Cabbage Roses (My Personal Favorite)
These take slightly more time but look expensive. Cut 8-10 petal shapes in graduating sizes. Start with the smallest petals and glue them in a tight circle. Work outward with larger petals, overlapping as you go.
The dimension on these is just chef’s kiss.
Simple Ranunculus (For Delicate Touches)
Similar to spiral roses but more refined. Cut a circle with a wavy edge instead of smooth. Spiral cut it. Roll from the center outward this time (opposite of roses).
The wavy edges create those gorgeous layered petals.
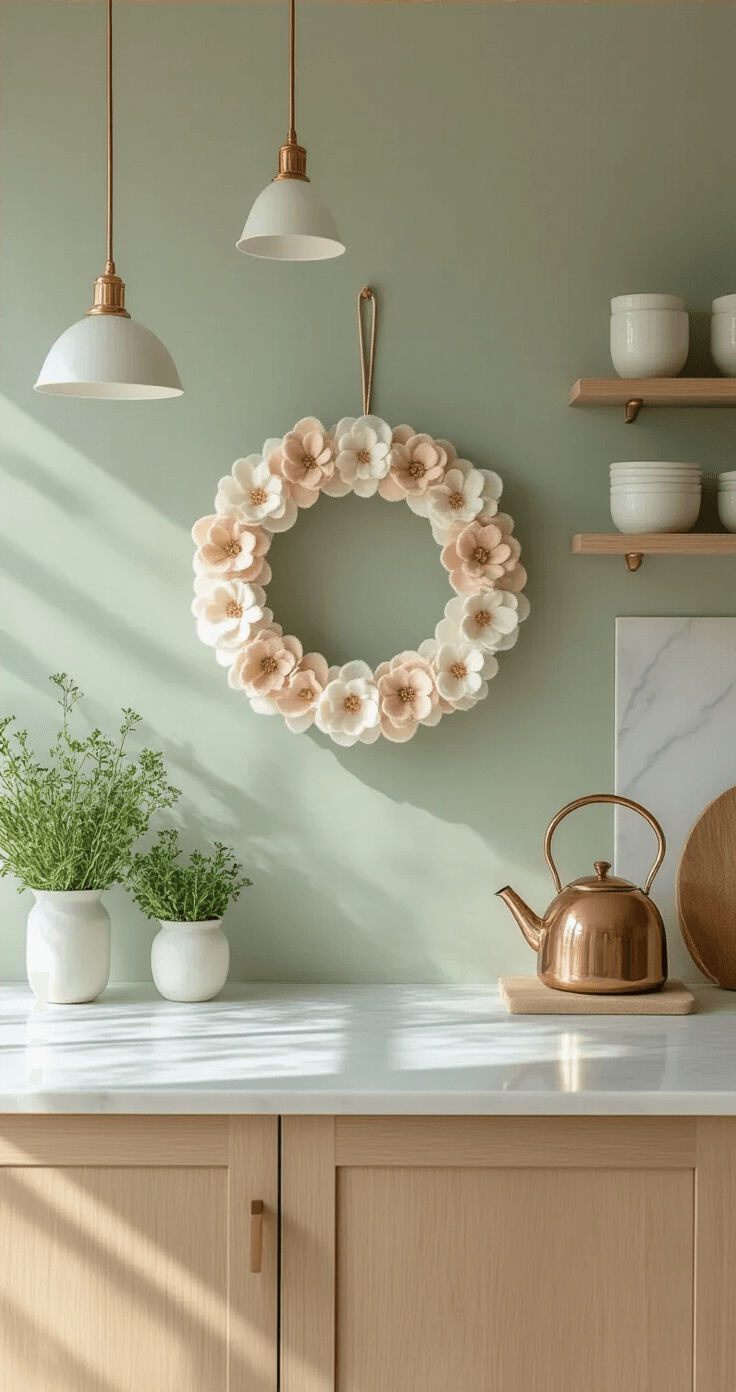
Anemones (When You Want Drama)
Cut a 2-inch circle for the center. Make tiny snips all around the edge to create texture. Cut 5-7 larger petals. Glue petals around the textured center.
Color combo that slays: Cream petals with a dark gray or black center.
💡 Steal This Look
- Paint Color: Behr Soft Focus T18-09
- Furniture: a vintage wooden farmhouse table with turned legs for your craft workspace
- Lighting: a brass adjustable-arm architect’s desk lamp with warm LED bulbs
- Materials: raw wool felt in dusty rose and sage, antique brass wire wreath forms, unbleached cotton ribbon
This is where the magic happens—my kitchen table transforms into a flower factory on Sunday afternoons, and there’s something deeply satisfying about turning simple felt strips into blooms that last forever.
How I Actually Assemble These Things
I’ve tried different methods and this order works best every single time.
Step 1: Prep Your Base
If you’re using an embroidery hoop, decide if you want the hardware visible or hidden. I usually position it at the bottom and plan my design to hide it with flowers.
Wire frames give you more flexibility for shape but need more coverage.
Step 2: Make More Flowers Than You Think You Need
Seriously. Make at least 20-30 flowers before you start gluing anything.
I learned this after running out halfway through and having to stop to make more. The momentum killer is real.
Step 3: Cut Leaves (Lots of Them)
Leaves are your secret weapon. They fill gaps, add movement, and hide mistakes.
I cut simple elongated ovals with pointed ends. Make them in 2-3 different sizes. You’ll need 30-50 depending on your wreath size.
Step 4: Place Everything Before Gluing
Lay out your wreath base and arrange flowers without glue first. Take a photo. Walk away for 10 minutes. Come back and look at the photo.
You’ll immediately see what needs adjusting.
Step 5: Glue Leaves First
This creates your foundation. Tuck them around the hoop at various angles. Don’t make them all face the same direction – that looks stiff.
Step 6: Add Flowers In Clusters
Group 3-5 flowers together in clusters rather than spacing them evenly. This creates visual interest instead of that awkward “I planted these in a circle” look.
Step 7: Fill And Adjust
Step back every few flowers. Add smaller blooms and leaves to fill gaps. Turn the wreath upside down to see it from different angles.

✎ Steal This Look
- Paint Color: Valspar Cozy White 7006-24
- Furniture: a vintage wooden farmhouse table with visible grain and slight distressing
- Lighting: a brass adjustable-arm architect’s desk lamp with warm LED bulb
- Materials: raw linen, unbleached cotton, weathered wood, antique brass, wool felt in muted sage and dusty rose
This is the room where patience actually pays off—there’s something meditative about the repetition, and the finished wreath feels earned rather than purchased.
Design Styles That Actually Work
The Maximalist Explosion
Cover every inch of that base. Mix flower sizes. Layer everything. Use 8+ colors.
This post may contain affiliate links. Please see my disclosure policy for details.


