

Fall Wreaths That Actually Look Expensive (But Cost Nearly Nothing)
Fall wreaths transform boring doorways into welcoming statements, and I’m about to show you exactly how to create one that makes neighbors slow down as they walk past your house.
I spent years wasting money on pre-made wreaths that looked cheap or fell apart after one rainy week. Now I make my own in less time than it takes to watch a Netflix episode, and they cost a fraction of what craft stores charge.
Let me walk you through everything I’ve learned so you don’t make the same expensive mistakes I did.
Why Your Store-Bought Wreath Looks… Wrong
You know that feeling when you hang up a wreath and something just feels off?
The problem isn’t you. Most pre-made wreaths suffer from three fatal flaws:
- They’re perfectly symmetrical (which looks artificial and staged)
- Everything sits flat against the base with zero dimension
- They use the same tired orange-and-burgundy palette everyone else has
Real designers create depth by layering materials at different angles. They use unexpected color combinations. They leave strategic gaps instead of cramming every inch with stuff.
Here’s what actually works: asymmetry, texture variation, and a clear focal point that draws the eye.
The Only Base You Actually Need
Forget fancy foam rings or expensive pre-decorated frames.
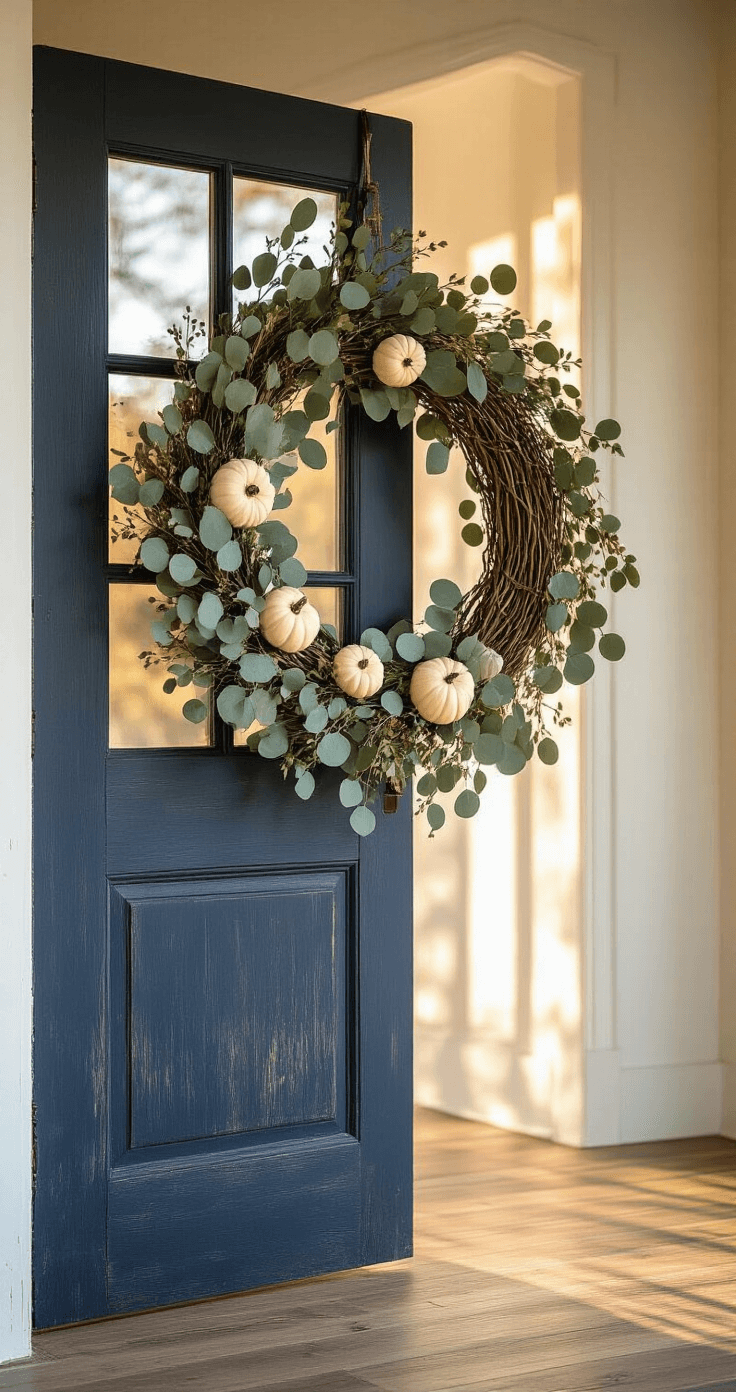
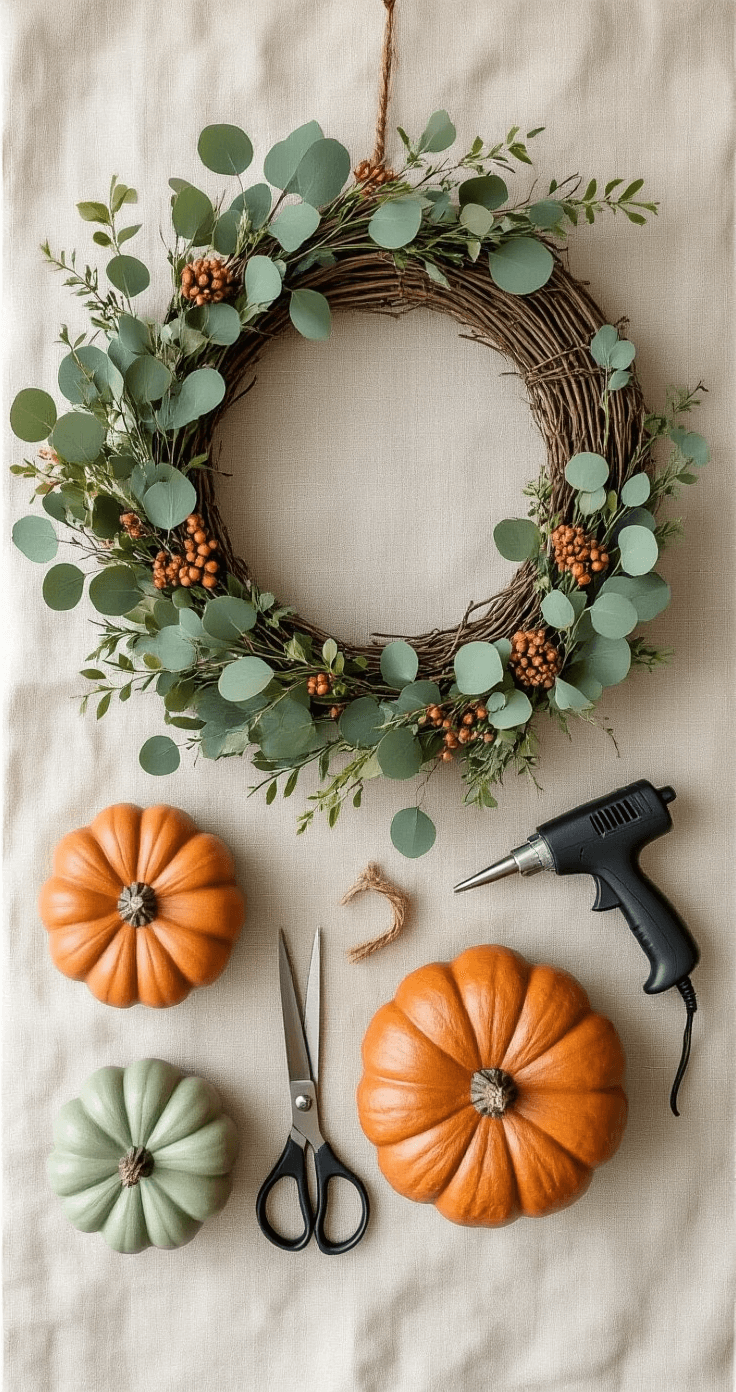
Grapevine wreaths are the secret weapon of every designer I know.
They cost around $5-8, provide built-in rustic texture, and here’s the genius part: stems wedge naturally between the vines without requiring mountains of hot glue or wire.
I’ve tried embroidery hoops (too delicate), wire frames (show through awkwardly), and foam bases (look cheap up close). Nothing beats grapevine for that effortless, organic look that photographs beautifully and holds up through wind and weather.
The 18-inch size works perfectly for standard doors without overwhelming your entryway.
My Exact Material List (Nothing Fancy Required)
Foundation layer:
- Eucalyptus stems (the backbone of every elegant wreath)
- Mixed greenery picks (ferns, magnolia leaves, or whatever speaks to you)
Texture builders:
- Small faux pumpkins in varying sizes
- Berry sprigs (burgundy or unexpected colors like navy blue)
- Fall leaf picks in non-obvious colors
Securing supplies:
- Hot glue gun with extra sticks
- Floral wire and wire cutters
- That’s literally it
Total investment: $15-30 depending on what’s already hiding in your craft drawer.
The Color Palettes Nobody Talks About
Everyone defaults to orange, gold, and burgundy. I’m begging you to consider alternatives.
Moody coastal fall:
- Deep navy blues
- Cream whites
- Sage greens
- Weathered wood tones
This combination looks sophisticated instead of predictable, and it transitions beautifully into winter holidays.
Neutral modern:
- All shades of green (olive, sage, forest)
- Natural brown tones
- Cream and ivory accents
- Maybe one burnt orange element as a whisper, not a shout
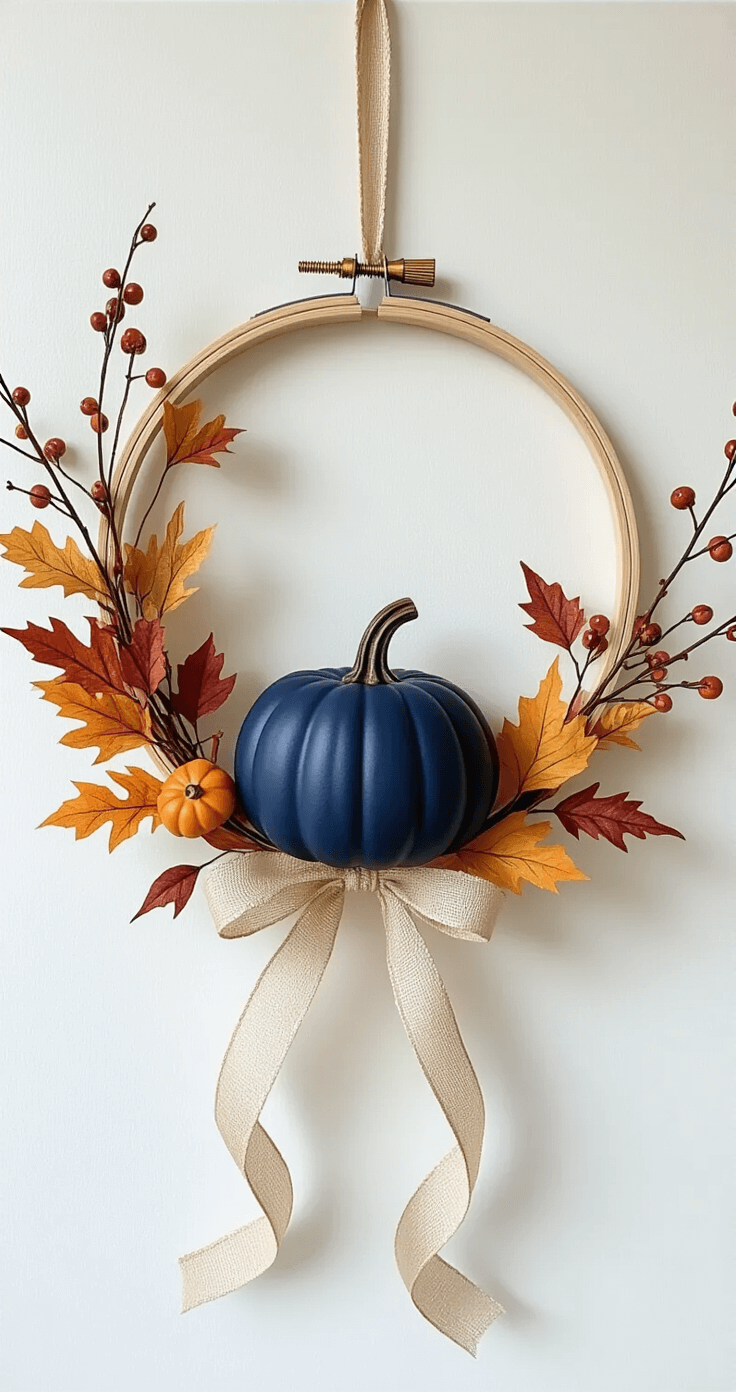
Unexpected jewel tones:
- Deep plum instead of burgundy
- Rust instead of bright orange
- Forest green with copper accents
Play with colors that reflect your actual home’s palette instead of what Pinterest says fall should look like.
The 20-Minute Assembly Process That Works Every Time
Step 1: Start with rebellion
Most people center everything. Don’t.
Pick one side (I prefer bottom-left or bottom-right) as your focal point. This immediately elevates your wreath from craft fair to designer.
Step 2: Longest stems first
Grab your eucalyptus stems or longest greenery. Wedge them between the grapevine tangles at angles that create movement.
Let some stems reach upward. Force others to drape downward beyond the wreath’s edge. This breaks the rigid circle and adds life.
Step 3: Build your background
Add shorter greenery picks to create a base layer. Don’t cover every inch—those gaps of grapevine showing through add authenticity.
Think about varying heights: some pieces flush against the base, others standing proud.
Step 4: Place your showstopper
Your largest pumpkin, most dramatic bloom, or statement piece goes in your chosen focal area. Hot glue this baby securely because it’s carrying the visual weight.
Step 5: Support cast additions
Add smaller pumpkins, berry clusters, and accent pieces around your focal point. Angle them in different directions rather than all facing forward.
I learned this from a florist friend: create triangles with your eye-catching elements rather than lines. It’s more visually interesting without knowing exactly why.
Step 6: Fill strategic gaps
Step back (seriously, walk across the room). Where do things look sparse?
Add small bushy picks or berry sprigs to fill gaps while maintaining breathing room. Overcrowding is the fastest way to cheapen your look.
Step 7: The flow test
Does your eye travel around the wreath naturally? Or does it get stuck in one clumped area?
Adjust stem angles so they guide attention in a gentle circular motion.
The Foraged Elements That Make Yours Unique
Here’s where magic happens: step outside.
I grab pruning shears and walk my property looking for:
- Interesting twigs with character bends
- Dried grasses gone to seed
- Rose hips still clinging to bushes
- Echinacea seed heads (those spiky globes)
- Pinecones under evergreens
- Acorns (check for bug holes first)
These free natural elements add texture you literally cannot buy. They make your wreath one-of-a-kind instead of looking like everyone else’s.
My neighbor thought I spent $80 on my wreath last year
This post may contain affiliate links. Please see my disclosure policy for details.


