

Why Your Door Needs an Easter Wreath (And Fast)
Contents
Let me tell you something. Your front door is the first thing guests see, and a bare door during Easter season is a missed opportunity. Easter wreaths aren’t just decorations—they’re your home’s handshake with the world.
I’ve watched countless people stress over finding the perfect Easter decor, only to realize they’ve been overthinking it. The truth? A well-chosen Easter wreath does all the heavy lifting for you.

What Makes an Easter Wreath Actually Work
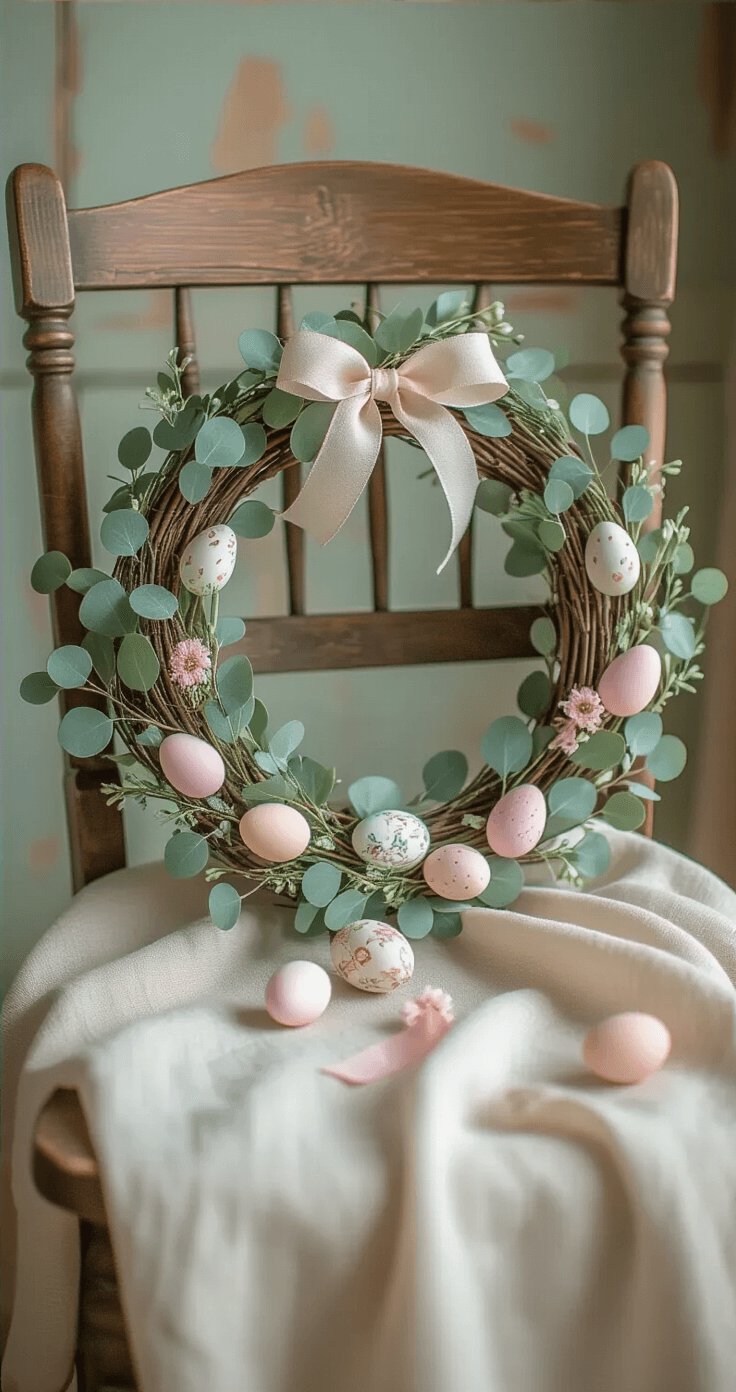
Easter wreaths come loaded with spring and Easter elements that signal celebration before anyone even knocks on your door.
Here’s what you’ll typically find:
- Pastel flowers in soft pinks, yellows, and lavenders
- Decorated eggs (real, faux, glittered, or painted)
- Bunny motifs and rabbit silhouettes
- Spring greenery and fresh-looking foliage
- Carrots, chicks, and other Easter symbols
- Grapevine or foam bases wrapped in ribbon
The best wreaths hit that sweet spot between “festive” and “tasteful”—they celebrate Easter without looking like a craft store exploded on your door.
Choosing the Right Size (This Actually Matters)
I learned this the hard way after buying a wreath that looked ridiculous on my door.
For standard front doors, you want 24-30 inches in diameter.
Here’s the breakdown:
- 22-24 inches: Perfect for apartment doors or smaller entryways
- 24-26 inches: The Goldilocks zone for most standard doors
- 28-30 inches: Statement pieces for double doors or oversized entries
Leave 2-4 inches of clearance on all sides. Your wreath should complement your door, not swallow it whole.
The Design Styles That Actually Look Good
Floral Explosion Wreaths
These are my go-to recommendation for people who want classic spring vibes.
Load them up with:
- Hydrangeas (faux ones look shockingly real now)
- Tulips in butter yellow or soft pink
- Wildflowers for that meadow feeling
- Mixed greenery for depth
The trick is layering textures. Flat flowers look boring. You want dimension, like the wreath is growing right off your door.

Egg-Centric Designs
Egg wreaths can go twee real fast, but done right, they’re stunning.
I’ve seen gorgeous versions using:
- Blown real eggs, hand-painted with delicate patterns
- Decorative Easter eggs in ombré arrangements
- Glittered eggs catching sunlight
- Speckled eggs for that natural robin’s egg look
The secret is commitment—don’t sprinkle a few eggs on a wreath and call it themed. Go all in or go home.
Bunny-Forward Wreaths
These work beautifully if you have kids or just love whimsy.
Popular approaches include:
- Bunny head silhouettes peeking from flowers
- Full bunny figures attached to grapevine bases
- Bunny ear bows as the focal point
- Rustic bunnies made from burlap or natural materials
One creative trick I’ve seen: using a white mop head cut and shaped into bunny fur texture—sounds crazy, looks amazing.

Carrot Patch Wreaths
For something less expected, carrot-themed wreaths bring the Easter Bunny’s story to life.
Think:
- Fabric carrots tucked into greenery
- Orange and green color schemes
- “Peter Rabbit” garden vibes
- Mixed vegetables for a spring harvest feel
These work especially well if your home leans farmhouse or cottage-core.

Faith-Centered Designs
If Easter’s religious meaning is central to your celebration, consider wreaths featuring:
- “He Is Risen” lettering
- Cross elements worked into the design
- Grapevine bases with minimal embellishment
- White lilies (the traditional Easter church flower)
- Purple accents representing royalty and sacrifice
These tend to be more subdued and elegant, letting the message take center stage.
DIY Easter Wreaths That Won’t Make You Want to Quit
I’m not going to lie to you—some DIY wreath tutorials are created by people with way too much time and skill.
But these actually work for normal humans:
The 10-Minute Deco Mesh Wreath
You literally cannot mess this up.
What you need:
- Wire wreath form
- 2-3 rolls of deco mesh in pastel colors
- Pipe cleaners or floral wire
- One statement bow or bunny pick
How you do it:
- Cut mesh into 10-inch strips
- Scrunch the middle and wire it to the form
- Keep adding until the form is covered
- Attach your bow
- Done
This technique is forgiving because the ruffled texture hides mistakes beautifully.

This post may contain affiliate links. Please see my disclosure policy for details.


