Rustic Spring Decor: How I Transform My Home Every Year Without Breaking the Bank
Contents
Rustic spring decor brings that fresh-air feeling indoors without the polish and pretense of catalog-perfect styling.
I’ve been decorating my home for spring seasons for over a decade now, and I’ll tell you straight up—the rustic farmhouse look remains my favorite because it forgives imperfections and celebrates character.
You know that feeling when winter finally loosens its grip? When you throw open the windows and suddenly crave lighter colors and natural textures everywhere? That’s exactly when I start pulling out my spring decor boxes.
But here’s what trips people up: they think rustic means expensive reclaimed barn wood and designer flea market finds. Wrong.
I’ve created stunning spring displays with thrift store ceramics, grocery store flowers, and branches I literally picked up from my backyard.
Let me walk you through exactly how I do it, year after year.
Why Rustic Spring Styling Just Works
The beauty of rustic spring decor lies in its forgiving nature.
You don’t need perfect symmetry. You don’t need matching sets. You definitely don’t need to spend three hundred dollars at the fancy home store.
What you need is an eye for texture, a neutral color base, and the confidence to mix grandmother’s vintage candlesticks with that ceramic bunny figurine you found at Target last week.
The rustic aesthetic celebrates:
- Imperfect finishes (distressed wood, chipped paint, weathered metal)
- Natural materials (real branches, linen, pottery, rattan)
- Lived-in warmth (nothing too precious or untouchable)
- Seasonal flexibility (swap elements easily without redoing everything)
I’ve watched friends stress over “getting it right” while decorating. But rustic styling doesn’t have that problem. If something looks too new, distress it. Too perfect? Add something weathered beside it. Too matchy? Break it up with something organic.
What You Actually Need (And What You Don’t)
The Non-Negotiables
After years of trial and error, these pieces form the backbone of every spring display I create:
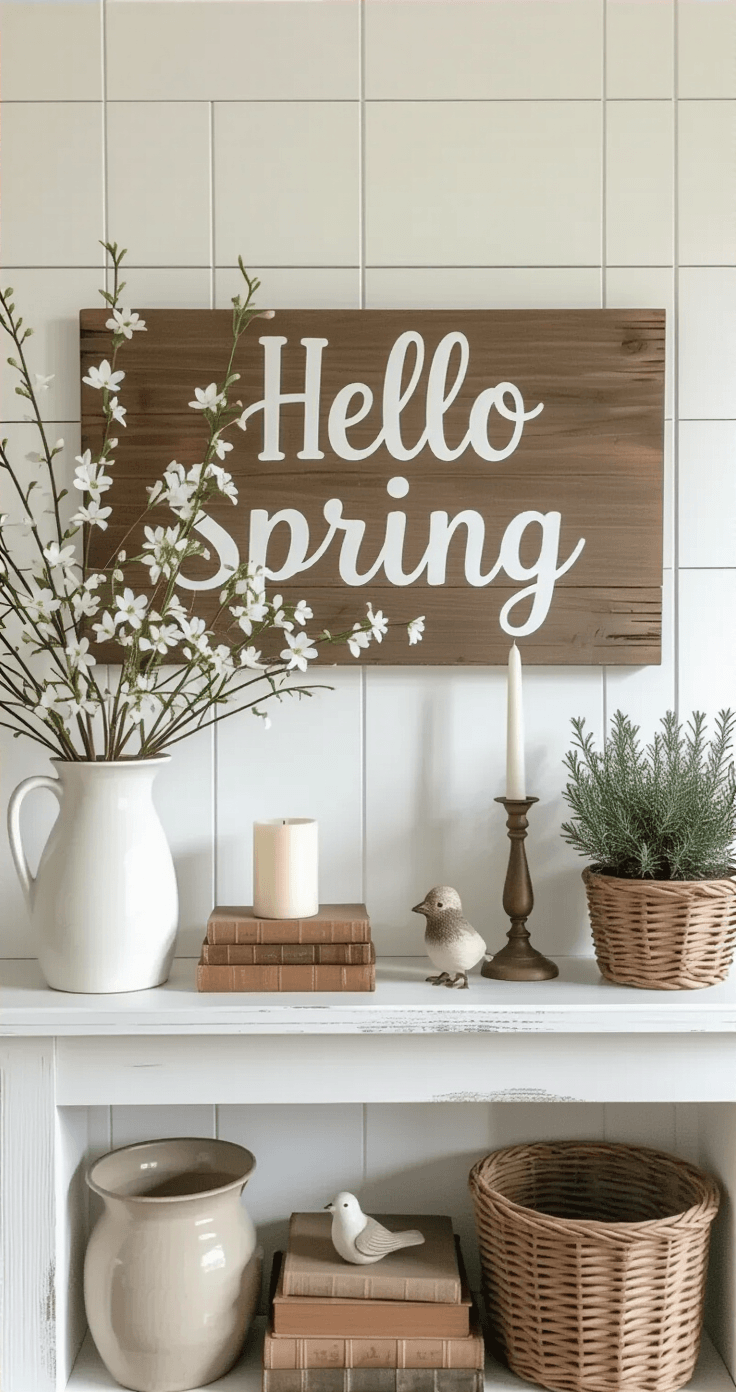
A neutral foundation piece
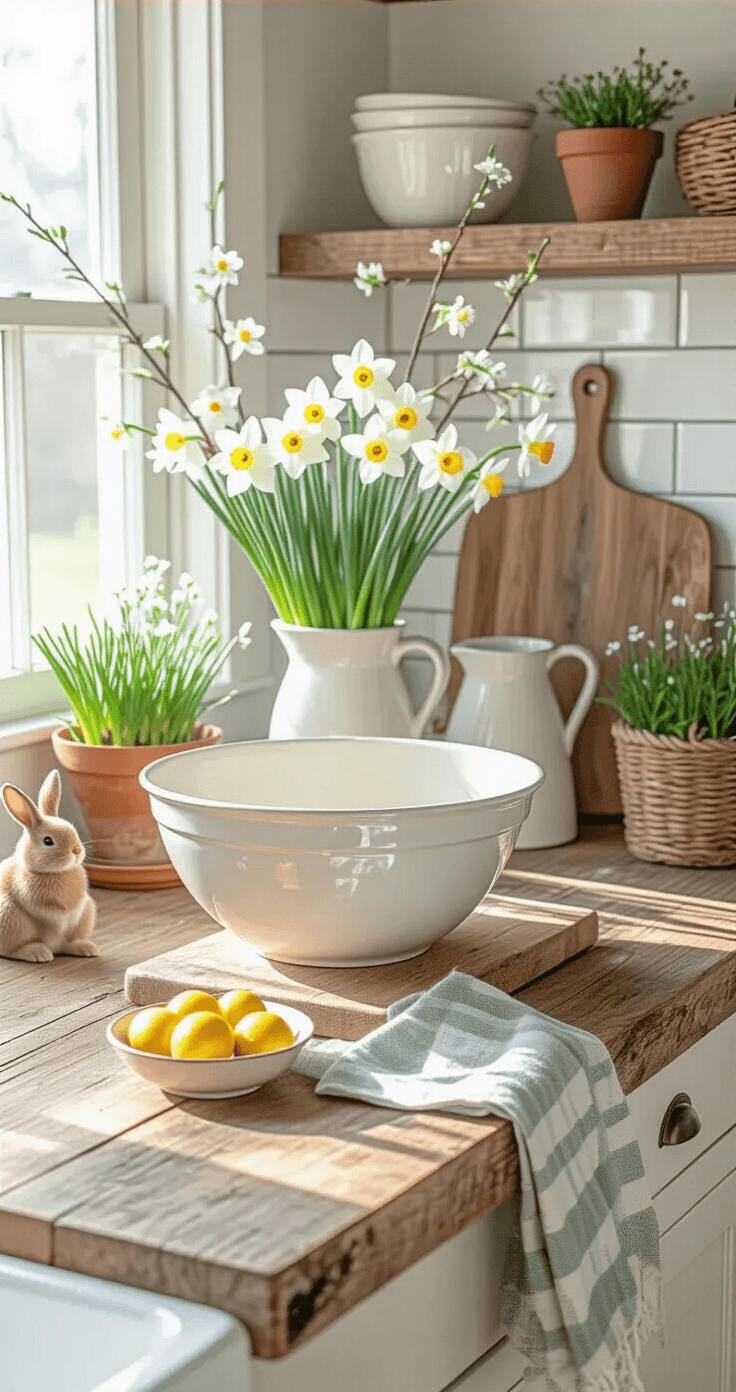
This could be a linen table runner in cream, white, or soft sage. I use mine on my dining table, buffet, and even draped across my entry console. Linen wrinkles beautifully—that’s a feature, not a bug.
One statement natural element
Fresh flowers work. So do flowering branches from your yard. I’ve used forsythia stems, pussy willows, and even magnolia branches. When fresh isn’t practical, I invest in one really good faux floral arrangement that I reuse year after year.
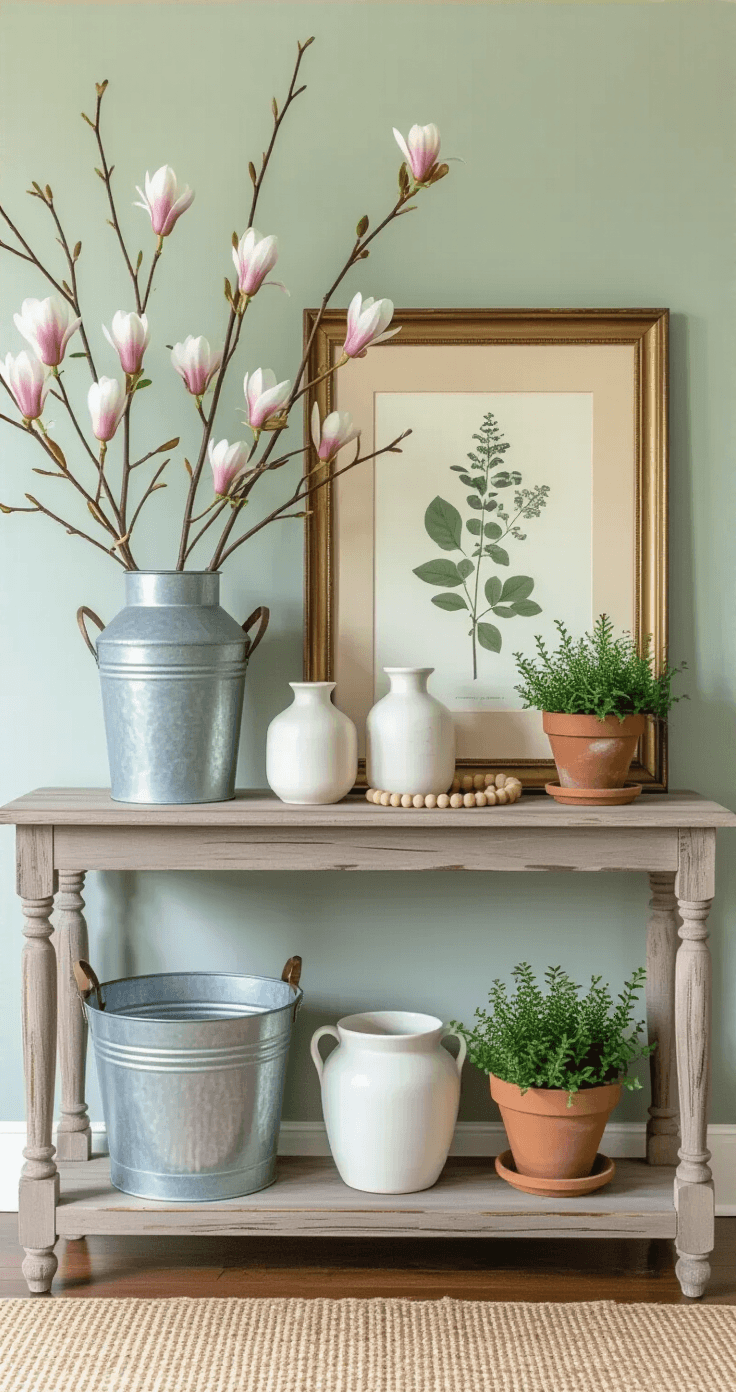
Weathered wood somewhere in the display
This is what sells “rustic.” A distressed wooden tray, a reclaimed wood frame, a chippy painted box—something with visible age and texture. I found my favorite pieces at estate sales, but craft stores sell perfectly good distressed wooden boxes for under twenty dollars.
White or cream ceramics
Simple pitchers, bowls, or vases in matte white. These become your workhorses. Fill them with flowers, eggs, moss balls, or nothing at all. They ground your displays without competing for attention.
The Supporting Cast
These pieces elevate your styling from basic to “did you hire a designer?”:
- Candlesticks in varying heights (distressed wood or vintage brass)
- Mason jars (I know, I know—but they work)
- Woven elements like rattan wrapped vases or cane trays
- Small wooden accents (bead garlands, carved birds, simple signs)
- Natural fiber touches (jute, burlap, sisal—used sparingly)
What You Can Skip
Don’t waste money on:
- Matching sets of anything
- Trendy colors that’ll look dated next year
- Plastic “rustic” decor (you can spot it a mile away)
- More than two or three bunny figurines (trust me on this)

My Foolproof Rustic Spring Table Setup
I style my dining table for spring every year, and it takes me about two hours from storage boxes to finished look.
Here’s my exact process:
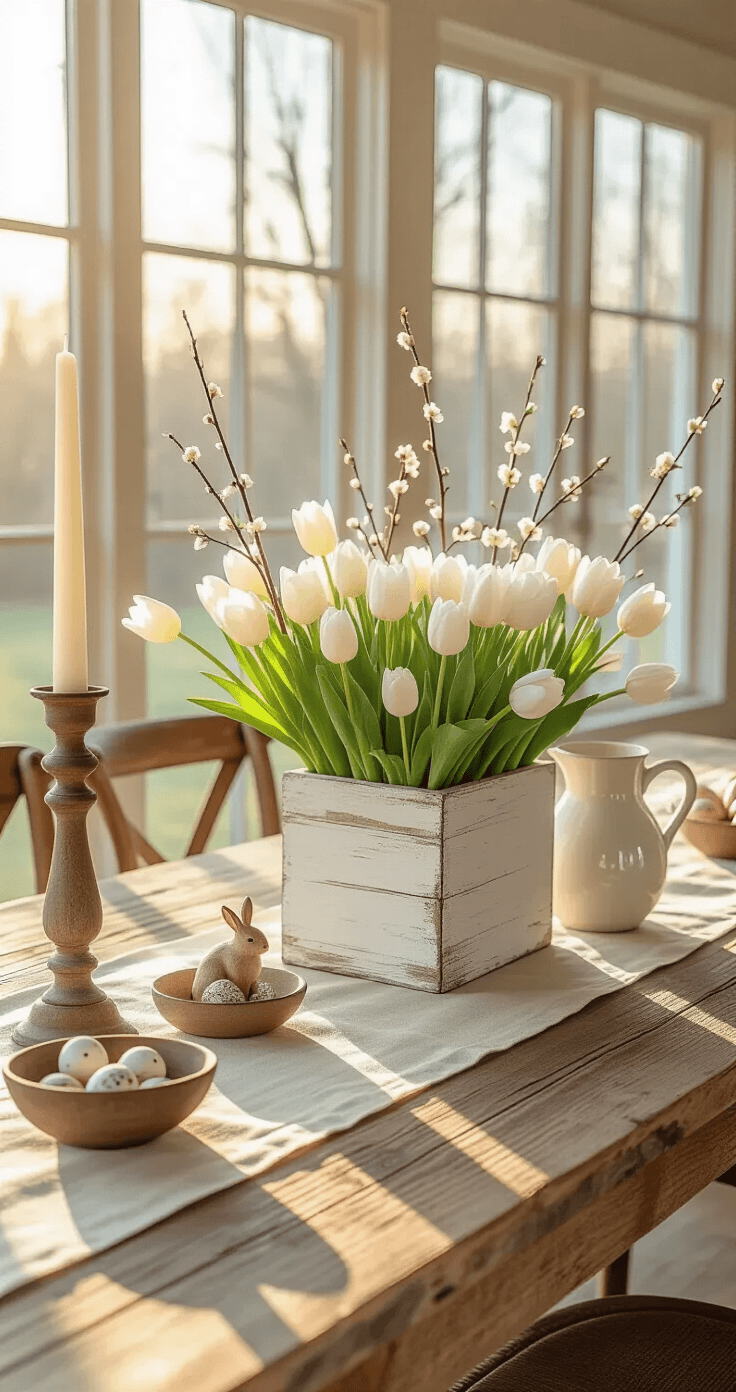
Step 1: Clear everything and start with the runner
I lay my neutral linen runner down the center of the table. Sometimes I use two runners crossing at the center for visual interest. Let the ends drape naturally—don’t fuss with making them even.
Step 2: Position the hero piece
This is your main floral arrangement or greenery display. I use a distressed wooden box filled with white tulips, or a galvanized bucket with flowering branches. This goes dead center (or slightly off-center if I’m feeling rebellious).
Step 3: Flank with height variation
On either side of my centerpiece, I add different-height elements:
- Tall: wooden candlesticks with white taper candles
- Medium: a ceramic pitcher with smaller blooms
- Low: a wooden bowl with decorative eggs or a small nest
The key is creating visual rhythm—tall, short, tall, short. Your eye should move easily across the display.
This post may contain affiliate links. Please see my disclosure policy for details.