DIY Christmas Wreaths That’ll Make Your Front Door the Talk of the Neighborhood
Contents
DIY Christmas wreaths transform a boring front door into a festive welcome mat that screams “I’ve got this holiday thing figured out!”
Look, I get it.
You’re scrolling through Pinterest at 11 PM, seeing these gorgeous wreaths that look like they came straight from a fancy boutique, and you’re wondering if you could possibly make something that doesn’t look like a kindergarten craft project gone wrong.
Spoiler alert: You absolutely can, and I’m about to show you exactly how.
I’ve made my fair share of wreath disasters (hot glue burns included), but I’ve also cracked the code on creating stunning wreaths that cost a fraction of what you’d pay at those overpriced home décor stores.
Why Your Current Wreath Just Isn’t Cutting It
Before we dive in, let’s be honest about something.
That store-bought wreath you grabbed last minute three years ago?
It’s looking sad, isn’t it?
The ribbon’s fraying, half the berries have fallen off, and it screams “I gave up on decorating” more than “festive holiday cheer.”
Here’s what happens when you make your own:
- You save serious money (I’m talking $10-50 versus $100+ at fancy stores)
- Your style actually reflects YOUR taste, not what some corporate buyer thought was trendy
- You get bragging rights when neighbors ask where you bought it
- You can change it up every single year without breaking the bank
The Four Wreath Styles That Actually Work (And Won’t Make You Want to Quit)
I’ve tested dozens of wreath styles, and these four consistently deliver that “wow, you made that?” reaction.
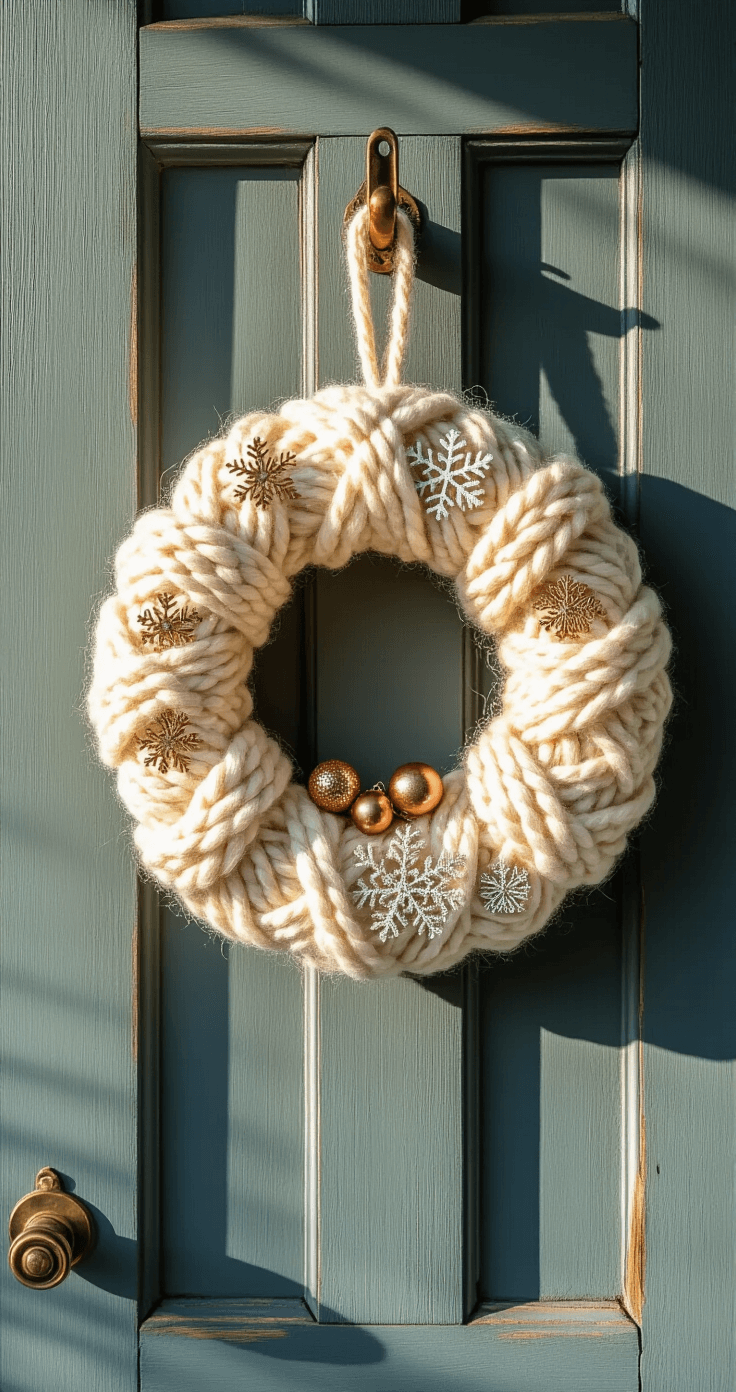
Yarn Wreaths for the Craft-Phobic
Listen, if you can wrap yarn around something and use a glue gun without losing a fingerprint, you can make a yarn wreath.
Last Christmas, I made three of these while binge-watching holiday movies, and they turned out better than anything I’d seen at HomeGoods.
What you need:
- Foam wreath base (the foundation that holds everything together)
- Chunky yarn or ribbon (go for texture—trust me on this)
- Hot glue gun (non-negotiable unless you enjoy your decorations falling apart)
- Small decorative accents like felt snowflakes or mini ornaments
The no-fail technique:
Start at the back of your wreath base.
Secure your yarn with a generous blob of hot glue.
Now wrap that yarn around and around, overlapping slightly as you go.
Keep the yarn taut but not strangling-the-wreath tight.
When you reach your starting point, glue the end down and trim.
Pro move: Layer different yarn textures—a chunky white base with a metallic gold wrapped loosely over it creates dimension that looks expensive.

Evergreen Wreaths That Look Magazine-Worthy
I used to think fresh evergreen wreaths required some kind of floral design degree.
Turns out, they’re basically organized chaos with a hot glue gun.
My first attempt looked like a bird’s nest had a fight with a Christmas tree.
My second attempt got me three neighbor inquiries asking where I bought it.
What you need:
- Pre-made evergreen wreath base (don’t reinvent the wheel here)
- Floral picks in varying sizes (snowy boxwood, cedar sprigs, pine branches)
- White berry stems for that frosted look
- Gold or red accent pieces (pinecones, bells, small ornaments)
- Wide ribbon for a statement bow
The arrangement secret:
Fluff your base wreath first—seriously, take five minutes and separate those branches.
This single step makes the difference between “nice try” and “holy cow.”
Start with your focal point.
I usually place mine slightly off-center at the bottom—it’s more visually interesting than dead center.
Insert your largest floral picks here, angling them to follow the wreath’s curve.
Work outward from there.
Add medium-sized elements next, creating a gentle gradient.
Fill any sad, bald spots with smaller pieces.
Group your accents in threes.
Three pinecones clustered together looks intentional.
Seven randomly scattered pinecones looks like you dropped them and gave up.
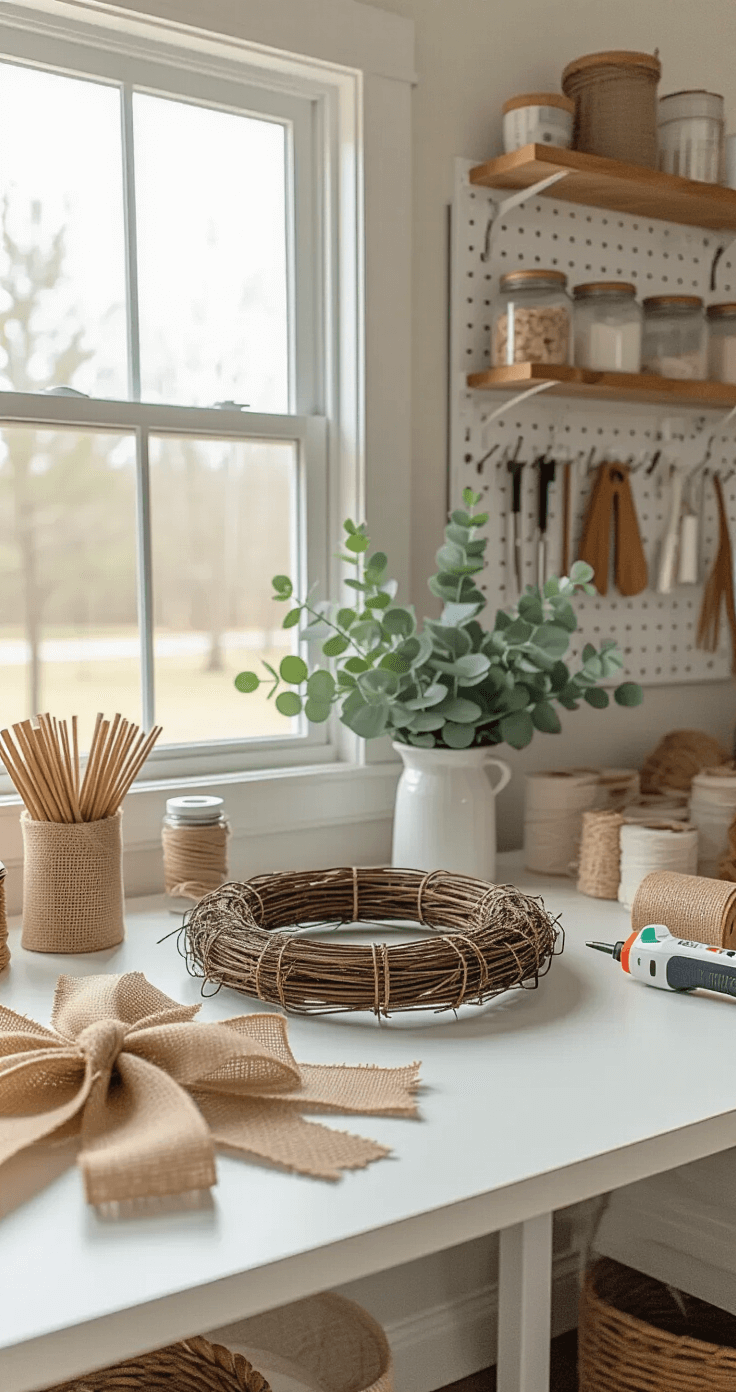
Dollar Tree Wreaths That Don’t Look Cheap
Every time I walk into Dollar Tree, I play a game called “What Can I Turn Into a Wreath?”
The answer is usually “everything.”
My favorite budget wreath cost me $12 and looks like I spent ten times that.
What you need:
- Wire wreath form from Dollar Tree
- Burlap ribbon or fabric strips (Dollar Tree sells this, but Amazon has better color options)
- Zip ties (the unsung hero of budget crafting)
- Artificial eucalyptus, olive branches, or any greenery that catches your eye
- Hot glue for final touches
The budget magic:
Cut your burlap into strips about 2 inches wide and 10 inches long.
Fold each strip in half.
Push the folded end through the wire wreath form.
Thread the loose ends through the loop.
Pull tight.
Repeat until your wreath looks full and fluffy.
Here’s the thing nobody tells you: It’ll look terrible at first.
Keep going.
Fullness comes with patience.
Once you’ve covered the entire form, trim any wildly uneven pieces.
Add your greenery by tucking stems into the burlap loops and securing with hot glue.
Less is more here—you want rustic, not “I fell into a craft store.”

This post may contain affiliate links. Please see my disclosure policy for details.