Christmas Door Wreaths That’ll Make Your Neighbors Actually Jealous
Contents
Christmas door wreaths are the first thing guests see when they arrive at your home, and honestly, they’re doing a lot more heavy lifting than we give them credit for.
I’ve been making these festive circles of joy for over fifteen years now, and I’ve learned that the difference between a wreath that makes people stop and stare versus one that just… exists… comes down to knowing a few key tricks.

Why Your Wreath Probably Looks Flat (And How to Fix It)
Most wreaths fail because they’re too timid.
People stick everything facing the same direction, use only one type of greenery, or worse—they buy a sad pre-made wreath and call it a day.
Here’s what actually works:
Layer like you’re building a sandwich, not painting a wall.
Start with your base greenery, then add medium-sized elements, then finish with your showstoppers—the berries, the ornaments, the stuff that catches light.
I learned this the hard way after my first wreath looked like someone had pressed flowers in a book and forgotten about them.
Create movement, not a mugshot.
Your wreath shouldn’t look like it’s facing forward for a passport photo. Angle stems downward and outward. Let some elements break free from the circular shape. Think waterfall, not target practice.

The Wreath Styles That Actually Work
The Classic Evergreen (That Doesn’t Look Like Everyone Else’s)
I start with a wire wreath frame because honestly, those foam ones fall apart faster than my New Year’s resolutions.
Then I layer different evergreens—not just pine.
Mix these textures:
- Cedar for that wild, feathery look
- Pine for traditional Christmas scent
- Eucalyptus for silvery contrast
- Holly for those satisfying glossy leaves
The secret nobody tells you? Add the greenery in small bunches, securing each with floral wire, and overlap them like shingles on a roof.
This creates depth instead of that sad, flat look.
The Ornament Explosion (Designer Style, Normal Budget)
Last year, I created a wreath that looked like it cost $300 but actually cost me about $45.
Here’s the formula:
Start with a pre-lit artificial wreath as your base (yes, I’m giving you permission to cheat here).
Then add ornaments in three sizes:
- Large (3-4 inches): Use 3-5 of these as focal points
- Medium (2-3 inches): Scatter 7-10 around
- Small (1 inch): Fill gaps with 10-15 of these little gems
Stick to two or three colors max. I’m obsessed with champagne gold, deep burgundy, and crisp white right now.
The trick that makes this look expensive? Cluster your ornaments in groups of three, positioned at different depths.
Some should sit on the wreath surface, others should stick out 2-3 inches using floral picks.

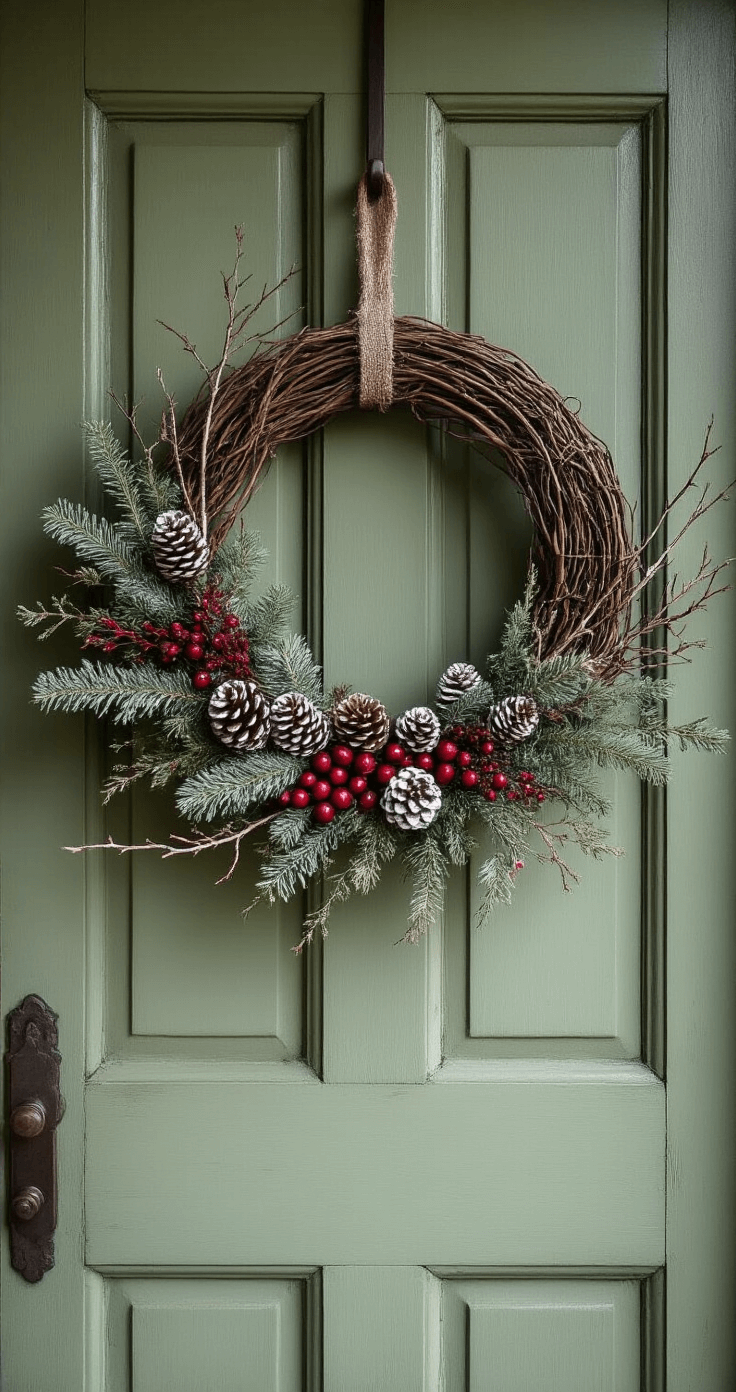
The Foraged Wreath (For the “I’m Effortlessly Stylish” Vibe)
This is my personal favorite because it costs almost nothing and looks incredibly intentional.
I walk around my neighborhood (with permission, obviously) and collect:
Winter berries that photograph like a dream:
- Holly berries (wear gloves, those leaves are vicious)
- Pyracantha berries (that gorgeous orange-red)
- Hawthorn berries (deep red, smaller)
- Cotoneaster (cascading branches with tiny berries)
Unexpected textures:
- Dried hydrangeas (they turn that perfect vintage color)
- Seed pods from magnolia trees
- Pine cones (but I spray paint half of them white or gold)
- Bare twigs with interesting shapes
Wire these onto a grapevine wreath base using thin floral wire that disappears.
The beauty of this approach? It looks different from every angle, and people always ask where you bought it.
“Oh, I made it from things in my garden” is peak humble-brag territory.
The Supplies That Matter (And the Ones That Don’t)
Actually Essential:
A solid base
Wire frames for fresh wreaths, grapevine for rustic looks, foam only if you’re going full artificial. Size matters—go 24 inches minimum for front doors, or it’ll look like a sad dinner plate.
Quality wire
Cheap wire breaks when you’re halfway through and you’ll want to throw the whole thing out the window. Get 22-gauge for structure, 26-gauge for detail work.
Sharp tools
Bypass pruning shears that actually cut instead of crushing stems. This isn’t negotiable—crushed stems mean brown, dead foliage within days.
Total Waste of Money:
Pre-wired artificial picks
These cost 3x more than making your own. Buy loose elements and wire them yourself.
Wreath-specific spray paint
Regular spray paint works exactly the same. Marketing departments are laughing all the way to the bank.
Expensive wreath hangers
Command hooks work perfectly fine. Your front door doesn’t know the difference.

How Long Will This Thing Actually Last?
Real talk: Fresh wreath
This post may contain affiliate links. Please see my disclosure policy for details.