Why This Works (And Why I’m Obsessed)
Contents
Listen, I’m not someone who spends hours in the kitchen creating elaborate spreads. I’ve got a life. I’ve got Netflix shows to watch. I’ve got a dog who thinks 5 PM is dinner time and won’t let me forget it.
But this Christmas tree charcuterie board? It’s the perfect marriage of impressive and effortless.
Here’s what sold me:
- Assembly time: 10-20 minutes max
- Skill level required: If you can stack things, you’re qualified
- Budget: $25-$75 depending on how fancy you want to get
- Wow factor: Off the charts
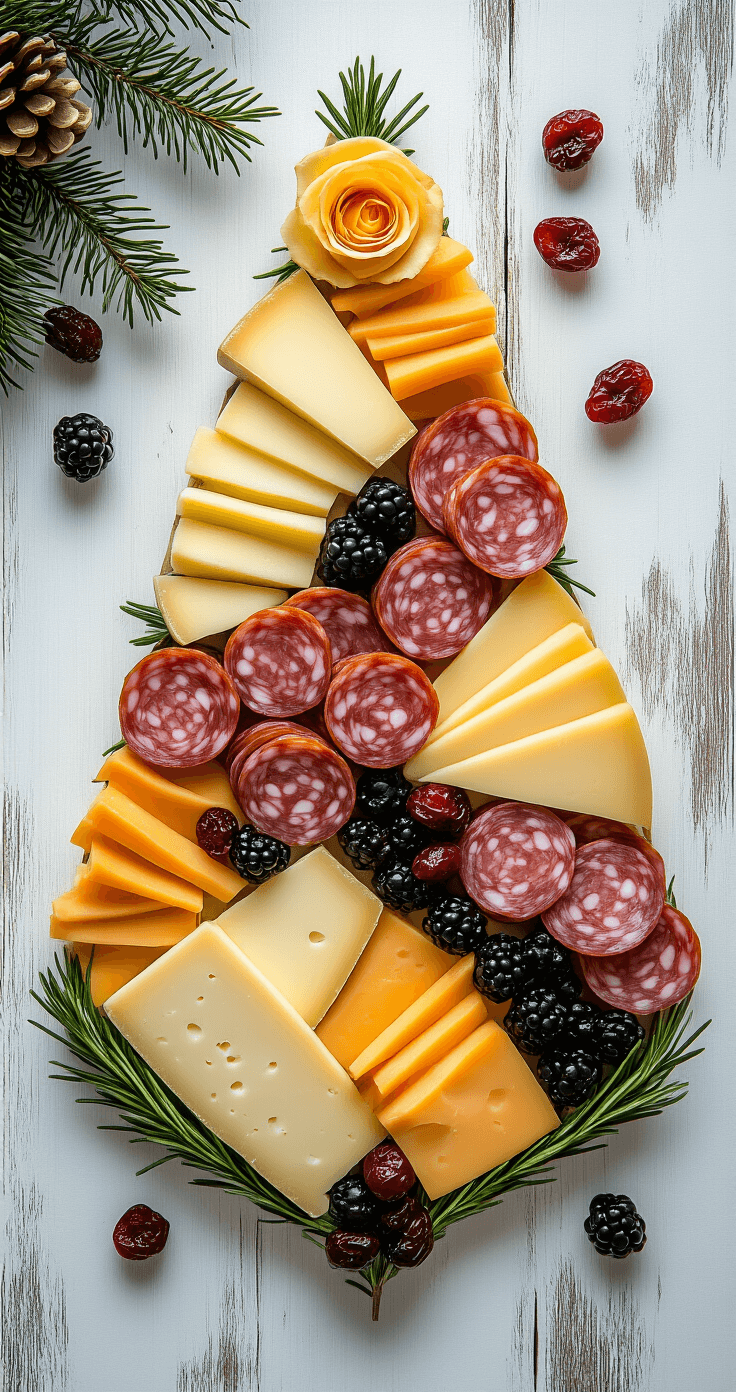
The whole concept is dead simple—arrange meats, cheeses, and festive goodies in a tree shape on a large wooden cutting board or platter.
That’s it. That’s the secret.

What You Actually Need (No Fancy Nonsense)
I’m going to be straight with you—you don’t need specialty ingredients or expensive artisan items from that boutique shop downtown.
The Cheese Situation
Start with cheeses that actually hold their shape when you cut them. Nobody wants a melty mess of brie sliding down their board before guests arrive (learned that one the hard way).
My go-to lineup:
- Sharp cheddar for that vibrant orange pop
- Gruyère for sophisticated slicing
- Brie for creamy richness (just keep it cold)
- White cheddar for contrast
Pro tip: Buy a cheese board knife set because using your regular kitchen knives makes cutting cheese way harder than it needs to be.
The Meat Department
Cured meats are where you add visual drama without adding work.
I typically grab:
- Salami (which you can fold into fancy rosettes if you’re feeling it)
- Prosciutto (drape it artfully and call it a day)
- Summer sausage (pre-sliced is your friend)
The key is variety in texture and color. Think about how they’ll look next to each other, not just how they taste.
The Supporting Cast
This is where you fill in the gaps and make your tree look lush and abundant:
- Fresh herbs: Rosemary is non-negotiable—it looks like little evergreen branches
- Crackers: Get a few varieties in different shapes
- Nuts: Pecans, walnuts, or almonds for the tree trunk
- Fresh fruit: Cherry tomatoes, cranberries, grapes, blackberries
- Dried fruit: Apricots, cranberries, figs
I keep a set of small serving bowls on hand for things like olives, honey, or jam—they become little decorative elements on the board itself.
Building This Thing (The Fun Part)
Alright, here’s where I walk you through this step by step because the first time I tried, I just started throwing things on a board and it looked like a cheese avalanche.
Step 1: Pick Your Base
You need something big. Like, bigger than you think.
A 16″ to 24″ surface works best—either a large bamboo cutting board, a wooden plank from that home goods store, or even a baking sheet lined with parchment paper.
I’ve used all three. They all work. Don’t overthink it.
Step 2: Visualize Your Tree
Before you start, picture an upside-down triangle. Wide at the bottom. Pointed at the top. That’s your tree shape.
Start at the base with your most substantial ingredient—I usually go with thick slices of sharp cheddar arranged in a generous bottom row.
Step 3: Layer Like You Mean It
Here’s the secret nobody tells you: work from bottom to top, making each layer progressively narrower.
Bottom layer: Your foundation cheese, nice and wide
Second layer: Maybe some folded salami or prosciutto, slightly less wide
Third layer: More cheese or crackers, even narrower
Keep going until you reach a point at the top
Think of it like building with LEGO bricks. Each layer should be stable enough to support what goes on top.

Step 4: Fill the Gaps
Once you’ve got your basic tree outline, you’ll have empty spaces. This is where the magic happens.
Fill those gaps with:
- Cubed white cheddar
- Cherry tomatoes
- Olives
- Nuts
- Dried cranberries
- Blackberries
Cluster similar items together—it looks more intentional than randomly scattering things everywhere.
Step 5: Create Your Trunk
At the very bottom, below your tree, stack some fancy mixed nuts or pretzels to form a little trunk.
Three or four pieces high is perfect. Don’t get carried away—this isn’t a redwood forest.
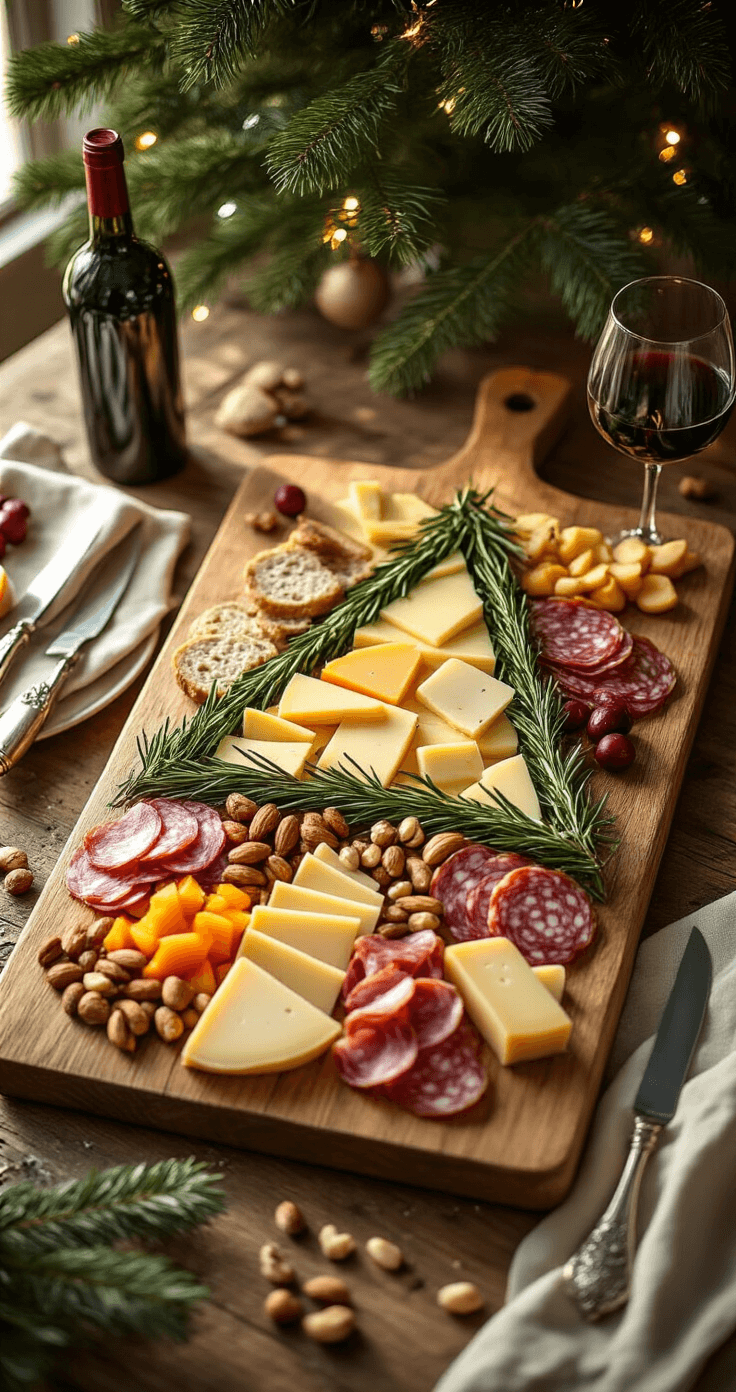
Step 6: Add the Greenery
This is where your board goes from “nice cheese plate” to “holy cow, is that a Christmas tree?”
Take fresh rosemary sprigs—lots of them—and tuck them around the outer edges of your tree to define the shape.
I add two longer sprigs at the very top pointing upward to emphasize the peak.
The rosemary does double duty: it looks gorgeous AND it smells amazing.
Step 7: The Star on Top
Cut a star shape from a slice of cheese using mini cookie cutters.
Place it at the very top of your tree.
If you want to get fancy, add a tiny dab of honey on it to make it glisten under the lights.
This post may contain affiliate links. Please see my disclosure policy for details.